
Ever since covid struck the world, the e-learning and online course market have exploded and are reaching new heights. Studies claim e-learning market is worth at least $300+ billion within next few years and will experience tremendous growth!
Now, why not exploit the rich experience and expertise that you have gained over the years? Share that expertise and knowledge with folks who desperately need the skills to thrive.This is why you should consider selling an online course.
There are plenty of online course platforms to give you a jump start. And it makes a lot of sense now, because, after pandemic struck e-learning got lot of attention and it is going to stay where folks are at home and can learn skills online.
A brief intro to online course platforms
Using an Online course platform, users (students) can have access to virtual courses, wherein a course instructor gives step by step organized lessons using videos, pictures, audio, and other digital assets like PDF files.
Student Perspective:
For the student, these learning platform offers wonderful features such as:
-
- Allow Students to add personal notes
- Do exercises after each class
- Take tests to verify skills learned
- Provide a completion certificate upon successful completion
Course Creator Features:
For the course creator, these online tools let you
- And for the course creator, you have a plethora of features to create an awesome course
- Setup membership communities and webinars
- Create an overall structure for the course and then Upload video for each lesson
- Crete assignments for each lesson
- Question and Answer or FAQ sections for your students.
- Accept Payments. You can even offer installments.
- Integrate the course within your own website
- Finally, help you market your course online and thus setup your online presence and branding
So now, let us see what are the best online course platforms.
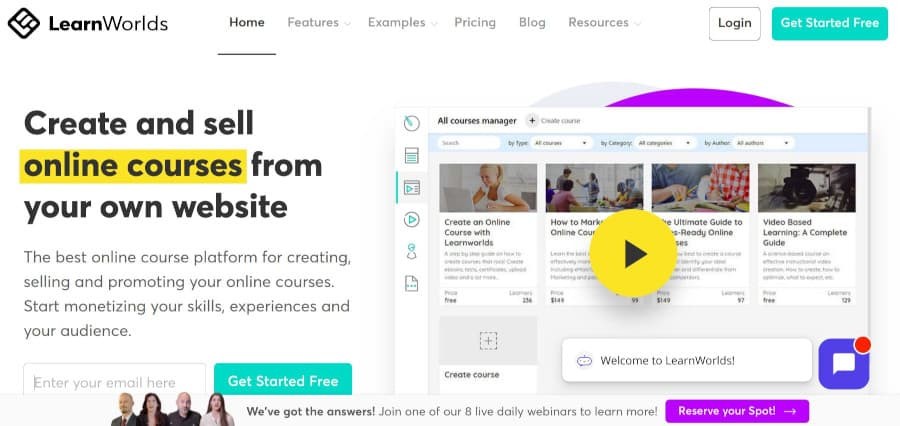
#1 LearnWorlds – Best interactive learning experience

- Staring Plan: $24/month
- Best for: Best for course creators looking for an interactive course experience
With LearnWorlds, you can create a beautiful online school without any technical skills and is the future of e-Learning. It has all the tools you need to create an engaging online course.
Learnworlds is one of the top course builders and is best for course creators looking for an interactive course experience for students. The interactive learning experience includes questionnaires, tests, and engaging elements, Learnworlds is the best choice.
How to create course in LearnWorlds – Steps in brief
- Design/Look and feel: Start with web design or look and feel of your online course. Use the high quality custom landing and sales pages to your advantage. LearnWorld has excellent set of responsive/mobile friendly templates to create your online course website. It comes includes most common pages such as About Us Page, Pricing Page, Contact Us Page,
- Branding: Now it is time to customize your branding. Here you add your logo and choose color scheme etc
- Create your course: Here, You can take advantage of pre-made course catalogs, You add your content using these catalogs.
- These catalogs include:
- Interactive video players
- Interactive e-books
- Interactive online tests
- Downloadable attachments(PDFs etc)
Since course is interactive in nature. students can take notes, can highlight important points and get course completion completion when done.
- Setup Domain and App and Market your course: Now that your content is ready, setup your custom domain name. Big feature here is that Learnworlds will create your own custom mobile app for your course! Isn’t that great? You can also create custom and coupons and discounts and market to your students.
- Final touches – Setup additional features : Here you can setup these additional wonderful features such as:
- Setup Social media integration for viral traffic
- take advantage of the analytics platform that can help you optimize sales
- Create membership sites
- Create a strong knowledge base
- Setup 24/7 support
Start building your online community with LearnWorlds
#2 Thinkific -Best Overall Online Course Platform


- Starting Plan: Free plan and plans starting from $39 USD/MO.
- Best for: Best Overall Online Course Platform
About Thinkific:
Thinkific is an excellent online learning platform with membership plans along with lessons and email marketing tools, Very user friendly and excellent customer support as well.
Getting started is easy. You can quickly sign up for a One-Month Free Trial and they let you play with their most popular Pro Plan. Pro plan is the most recommended plan to get started with.
You do not need a credit card to play with trial account.
With Pro plan you can
- Create unlimited courses
- Add membership plans
- Beautiful landing pages
- Advanced pricing options
- Marketing tools
- Add certificates
Plan of Action: 4 steps to create a course in Thinkific.
- Step 1: Getting Started: Create account and customize course player. This is where you do all the basic steps of the course.Create your account: Create a new account and you are directed to your Dashboard. Explore what you can do: You are greeted with very helpful quick start videos that are very helpful;.Customize your Course Player: Course Player is where your students learn more about your videos, quizzes, etc. In this step, you can add your logo/branding etc and play with colors of the Course Player to fit your brand.Preview Course Player: Check out and see how your course player will look like, from a student perspective. This will give you an idea how the course player looks like for the student and make adjustments if needed.
- Step 2: Build the course: In this step, you will create your course. You start adding chapters and under each chapter you can create lessons. If you have content in a PDF or even a video, you can import into lessons!pic here,,,
- Step 3: Design your course website
You can design and setup your entire course website here. You can create your beautiful site pages like home page, about us page, courses page, bundles pages etc. You see, this is where thinkific gives more value. Totally worth the money spent. - Step 4: Market and sell your courses: Now it is time to market and sell your courses.Here you can:
- Setup coupons
- Integrate with your payment provider (Paypal, stripe etc)
- Connect to Google Analytics for better site insights
- Setup email marketing with your favorite provider like Aweber, ConvertKit etc
- Webinar or live lessons: Setup Live Lessons using Zoom’s video meeting and/or webinar tools.
Verdict: Thinkific is very user friendly and features galore. You can quickly get started and you get all the tools to succeed. You do not need a credit card to try
#3 Teachable – Course Platform for Beginners (Starting from $29)

- Starting Plan: Free plan as well as paid plan starting from $29 USD/MO.
- Best for: Best e-Learning Platform for Beginners
Teachable comes next in our list of e-learning platforms.
Fact check: Did you know that there are close to 20,000+ instructors who have used Teachable successfully to create courses?
Teachable Homepage
You can start using Teachable for free (Transaction fee applies – $1 + $0.10 per transaction). We recommend using their Pro plan($119/month), as plan offers some good features.
Pro plan($119/month) features:
- Zero transaction fees
- Course product
- Coaching product
- Members-only community
- Instant payouts
- Priority product support
- Graded quizzes
- Advanced reports On courses, students, videos, and upsells
- Course completion certificates
- Integrated affiliate marketing
It’s easy to get started with Teachable. You can get started with the free plan. Just upload your content, work on the web design of your online school(drag and drop designer included) and your course site is ready!
Get started with your Teachable today!
#4 Podia – 5+ tools for one price
Podia is an all-in-one website builder where you can sell digital downloads, courses and memberships in one place. It has zero transaction fees. This innovative platforms handles everything for you, like sales pages, website or file hosting, checkout process, email marketing,

Bonous: Podia offers free migrationsfrom other competng platforms for customers who sign up for our Shaker plan (or a yearly Mover plan).
Here’s the best part: You can try it’s 14-day free trial with no credit card required… This means you can try it’s features and if you don’t like it, you can leave and you owe nothing.
Best Features
-
- Live customer support
- Unlimited hosting included
- Language and Currency: Choose from 11 languages and 22 currencies.
- Build your website: Add about page, contact us page, and additional pages you’d like your visitors to see.
- Custom URL: Make your site your own with a custom URL.
- Pre-launch courses: Collect email addresses before your online course launches to gauge interest before you build.
- Pre-sell courses : Start selling your course in advance, by setting a start date in the
- future.
- Lead magnets: Offer free digital oroducts or downloads and collect email addresses and build your audience.
- Quizzes: Test your students’ knowledge with interactive quizzes at the end of modules.
- Integrations: Connect Google Analytics, Facebook Pixel, and more.
Steps in Brief: Here are the 4 steps that needs to be taken to setup an online course website with Podia.
Step 1: Setup your website
Get started by adding your info, connecting your favorite apps, and choosing your custom URL. If you already have a course content elsewhere, podia will migrate it for free(only for customers who have signed up for a Shaker plan (or a yearly Mover plan)
Step 2: Customize and match your brand
Customize your homepage and sales pages so it matches your brand. You can add your logo and customize the colors to suit your brand. Or if you want to, you can build something from scratch and podia give you plenty of design options.
In this step, you can also add videos, images, testimonials, webinars etc. Best thing is, design is responsive, meaning your website and content will look great on desktops, tablets, and mobile phones. And finally, you have a live preview feature, where you can see exactly how everything will look in real-time as you continue making changes.
Step 3: Add your products
Here you add your online courses, digital downloads, and membership plans in a few clicks. All podia plans have unlimited bandwidth, products and customers.
Step 4: Start marketing. Build our list. Chat in real-time with your customers
In this step, you can start building your email list or your can tart marketing to your existing audience. If you already have an email list, podia can help you migrate your customer list for free. And to grow your email list of customers, Podia has all the tools for effective email marketing. You can also chat in real-time with your customers using built-in messaging feature.
Summary: Podia gives lot of value for a small price. You can try it’s 14-day free trial with no credit card required. This means you can try it’s features and if you don’t like it, you can leave and you owe nothing. Plans start at $39 per month.
How Can I Create and Sell an Online Course?
You have seen the best platforms for creating an online course website. We will also see how you can plan and create content for your online course. Here are the steps outlined below:
1. Choose an Indemand Topic you are passionate about:
Your need to choose a course topic that you are passionate about. I mean, witjhout any passson, working on a best-seller blockbuster course will be a tedious task. But if you have passion for a topic, that your creative ideas will flow naturally and you will be able to enjoy the entire pricess as well.
There are plenty of topic ideas you can come up. Just think about your skills. Or joyful(or opainful) life experiences …. It could be gardeneing or Cooking or writing books or programming or home interior decoration. Ideas are plenty.
Once your course topic is ready, you need to test the market first. Feel the pulse and find out if the topic has very good market demand.
You need to find out of people talking more about the topic, if people are asking questions. You can use Google trends to find out if the interest exist for a topic.
And if there already exists a course for same topic(your competitor), can you add more topics that does not exist in that course?
Research: So to understand more about what your students need, start with some research. Check out Quora, reddit or other forums, telegram channels, slack channels etc related to your course topic, and look out for questions being asked.
2. Create Awesome Learning Outcomes
A Learning outcome basically explains clearly, after course completion, what skills a student will be able to demonstrate and what new skills they have acquired and how the student feels.
This is an important step. You have to create a clear compelling learning outcome. This way you are always focused and thus be able to deliver a best-seller course, where only the RIGHT students are joining and are highly satisfied with your course. This also ensures positive reviews and low refunds!
3. Create Course Content and Setup Structure
Gather Content:
This is where your passion plays a big part.
You can collect your content from various sources. Part of it could be in our head. You can jot it down to your word processor. Or content could be in PDF’s or books you have read or in your personal notes etc. Collect all that. Make sure you don’t miss out any.
Also make sure your content is in line with your learning outcome. Only add content that your audience need. You can also add content that is relevant but was left out by your competitor.
Setup Structure:
Now that you have content lying around, it is time to group content into
sections and lessons and sub topics for each lesson. Make sure that lessons follow a nice sequence.
4. Decide Delivery Method for Each Lesson
A best-seller course will have an ideal balance of visuals, audio and practical methodologies(quizzes, online tests etc) so that students are engaged and students feel they are making good progress and see value in your course.
So you have to decide and plan each lesson’s delivery method. Will a particular lesson have video or audio or test activities(quizzes, online tests etc) ? You can have audio only lessons as well, if you are camera shy.
Also plan to have a Q&A section so that for each lesson, you can add most commonly asked questions and answers. This way you can reduce support time and save time for student and you as well!
5. Record and Edit each lesson
This is where the course “happens”.
Know this.. that the most effective method is, yes, you know it… video.
You can creating different types of videos:
- Screen casting Videos: Here you record your computer screen, while you narrate and explain. You can also have your webcam capture you on side of the screen.
- Talking head video: A talking-head video is type of video, where you just talk to the camera direct.
- Green screen Videso: This a a very popular type of videeo recording and you need a software like Camtasia to do green screen recording. Here when you record video using the software, a green background appears behind you.
- Later, when you edit the video using the software, behind you, you can add an image , logo or animation or a power point slide (to replace the green background). These kind of videos are great classroom type training courses. The entire video can be exported as mp4 format and then uploaded to your course creator website.
- Voice-over-slides : If you are camera shy, you can use a software to record your computer screen as you show a slideshow presentation, while you record your voice over using a microphone. This is called voice-over-slides
6. Create your your online course website
Now that you have content all ready, it is time to set up your online course website.
Use any of the recommended tools in this article, even though we recommend Thinkific, It has a nice workflow and lets you create outline and upload content in a very user friendly manner.
7. Create an ideal price for the course
You need to price your course based on the value and content you are providing. Best way to get started is, find how your competing courses are being priced. If you feel. your course is better, don’t feel shy to come up with a higher price tag.
8. Launch course and Market it well
Of course, now launch the course after all the hard work you have done.
For a best seller course, you need make consistent marketing efforts to promote your course and enroll more students. You have to look into marketing methods like having early bird discount promotions, run ads(google ads, you tube etc), email marketing , find online influencers who can promote your course, run an affiliate program, social media marketing,
So you have seen 8 steps to create that awesome blockbuster online course. If you have any questions, leave them in the comment section below!
Accessories needed to create a nice online course.
Microphone:
Whether your course lessons are audio only or live video, it is important to use a high quality microphone to record your voice. Here are our 2 recommendations.
- Logitech – H390 USB Headset with Noise Canceling Microphone
- Rode Procaster Broadcast Dynamic Vocal Microphone
Foam
Use Foam balls and pop filters to prevent those popping sounds when air pushed from your mouth hits the microphone.
Headphones
You need headphones during the editing process, so that you can hear clearly the audio that was recorded for each lesson. They are also great for recording interviews
Screen Recording Software:
If you do not want to record live videos, then you can use a software to record your computer screen as you show a slideshow presentation. This is called voice-over-slides
Video Recording (Webcams or SLR)
You can record your live videos using a simple webcam or even your a mobile phone. But for high quality videos, a digital camera os the best option. Here are a few options:
Audio and Video Editing
After recording your audio and/or video , you have to edit those recordings before uploading to your online course. This process can be done by a professional by outsourcing it. If you plan to do it yourself, you may need following:
Verdict
All course platforms above are excellent recommendations. We strongly recommend Thinkific as features galore and it is free to get started. You can create unlimited courses, add membership plans, get beautiful landing pages and has excellent marketing tools to help you sell the course as well.