
In another article, I explained how to create a photography website using Wix, a popular website builder. I also listed advantages and disadvantages of using Wix in same article.
No time to read? Download this article as PDF!
One of Wix’s biggest disadvantage is you are stuck with the platform, and options are limited.
Enter WordPress: Flexible and lot more freedom!
WordPress needs no intro. You probably heard that 33% of world’s websites are using WordPress CMS(Content Management System). It is that popular and its growing fast!
6 strong reasons to create a photography website using WordPress:
#1 Open Source CMS: Unlike Wix, WordPress is open source. Meaning, software for which the original source code is made freely available and may be redistributed and modified.
#2 WP is everywhere: Since WordPress is free, it is freely available to install in many popular web hosting companies. You just need to signup for a reliable web hosting company’s WordPress hosting plan and you have WordPress!
#3 Plenty of Photography Templates/Themes: WordPress has may free photography website templates(also known as themes in WordPress). so you have plenty of options. You can play with many themes and can stick with one that you like the most.
#4 Plenty of Plugins: Plugins are free additional modules you can add from WordPress Plugin Store to add a functionality to your site. For example, you want to add a Contact Form to your site, no problem. Add a plugin like Contact Form 7 That’s it! No coding and mess… You see, that’s the beauty of WordPress. You can find plenty of plugins for any purpose. Contact forms, add social bar, SEO..you name it ..you have plugins for that!
#5 Setup portfolio, Client albums: You can setup your portfolio as well as client albums using a good theme. We will show how. Details below.
#6 Strong support and developer community: Once you launch your photography site, you may come up with questions. WordPress has an excellent community and forum where you can ask your question and you get answers to your question. Also WordPress has a HUGE developer community that keeps adding more themes and useful plugins to WordPress Store. This is good for the site owner. You have plenty of options to choose from..
You see.. WordPress offers lot more freedom, flexibility and plenty of options when compared to Wix. This is why we recommend WordPress for a photgraphy website. Learning curve is also very smooth.
#wordpress for photographers #wordpress photography website themes
About this guide and promise:
After reading this detailed guide, you should be able to launch your own photography website. It has step by step instructions to setup a WordPress website, add your photography website theme/template, then add photos and finally to launch. If you follow instructions step by step, you can create a nice photography website with awesome portfolio.
This course will show you how to:
- How to signup for a hosting account and setup WordPress in it
- Add a nice design or theme to your website – 1 minute to complete
- Add most relevant plugins or modules the site needs – 1 minute
- Create and arrange portfolio pictures or albums – About 5 minutes per album of around 20 photos. (This of course will vary if you have lot of pictures to upload.)
- Setup an About Us Page – 2 minutes
- Setup a “Contact Form” – 2 minutes
Here’s a nice demo:
WordPress Photography/Portfolio Website Demo
You see.. You can always play with the sliders or albums .. play with colors for the theme.. It is very easy to customize and it takes less time..
About the Author of this Guide:
Hey, I am Tom and I am the senior Editor of this blog. I am an experienced web master and have created numerous websites for myself and for many clients. I do freelancing as well. This blog itself is created using WordPress. I just wanted to say that any one with minimal skills can complete these steps below.
Help/Support: If you want us to Install the theme and plugins, you may Contact Us( shoot us an email to contactus at findbestwebhosting dot com). You should be able to do it by yourself. But if you need help, ask for help.
How to create a photography website using WordPress? Step by step instructions:
Step 1: Setup a Web Hosting account. Setup your domain name as well.
Step 2: Install an awesome Photography theme (and plugins)
Step 3: Setup your Portfolio/Galleries. Add photos and photo galleries
Step 4: Launch your site! Setup Social sharing for traffic.
Details below.
Step 1. Setup a Web Hosting account and Domain
Setup WordPress in a web hosting account. Setup domain as well.
This step is much easier than you think. but you have to make sure you use a reliable and web host who has WordPress expertise as well.
We strongly recommend BlueHost. It is also recommended by WordPress itself as the #1 recommend WordPress host. Bonus: You get a free domain name as well when you sign up!
We will show below how to purchase a WordPress hosting plan and buy your domain as well in the process.
1. Visit Bluehost hosting. Click on get started now button


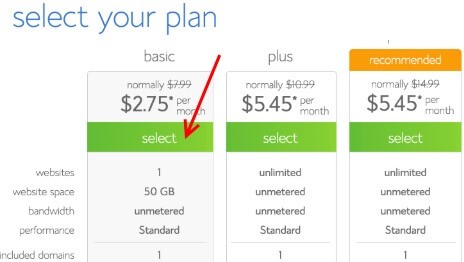
2. Choose a Website Hosting Plan. We recommend basic plan, which will be a good starting plan for your website.

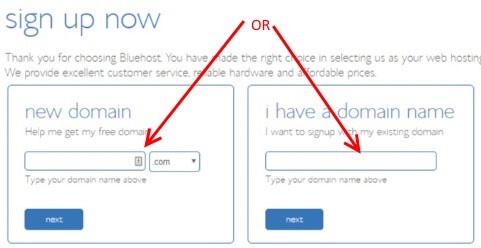
3. Choose a Domain Name. Get a free Domain name!

4. Fill your personal details.


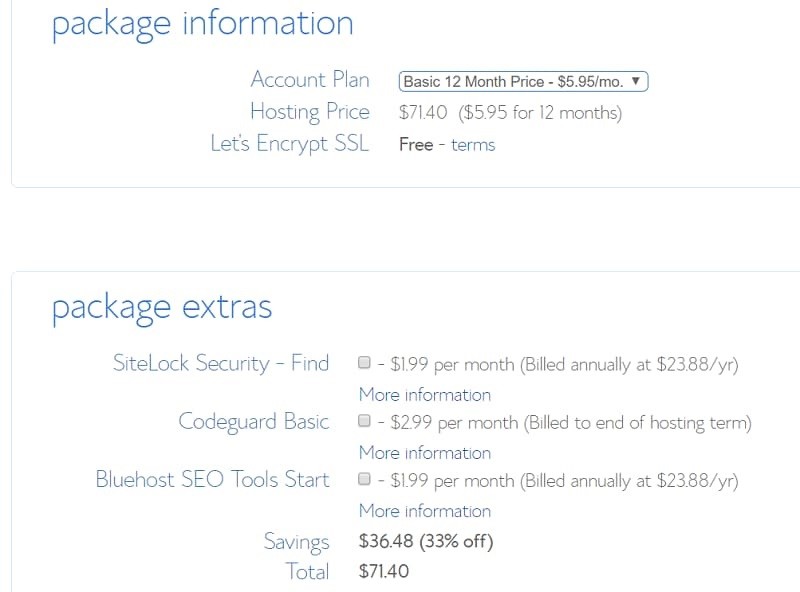
5. Select your package information and later and package extras. We recommend that you choose minimal options and uncheck all extras. You are getting started. Once site is launched and established, you can always go back to support to add more features. Priority now is to setup the website and launch!

Scroll down a bit. enter your credit card details and click Submit. Then complete the registration process.
Once you’ve signed up for a BlueHost account, you will receive a welcome email with control panel login details. WordPress comes installed once your account is created!
Congratulations, you’ve completed first step. You’ve signed up with Bluehost and have WordPress installed in your account.
Step 2: Select Photography Theme. Add plugins as well
Now that you have installed WordPress in your host, let us setup a nice design for your website.
In WordPress this design is called a theme. Please note there are free as well as paid themes. We recommend a free theme to get started with. There are plenty of free high quality photography themes which has high utility and functionality.
We recommend free theme Portfolio-gallery theme from Web Dorado team and this theme has amazing features. You can setup portfolio and gallery as well. But hey, you can of course choose any photography theme you like.
We have even setup a demo website for you.
Here’s a nice demo:
WordPress Photography/Portfolio Website Demo
Please note this is only a demo site. We have chosen some nice pictures.
But you can always customize it the way you like so that it is unique and as per your taste. But when you add your high quality pictures to your site, that’s when the magic happens. Photos are the lifeline of your site.
So let us add that nice theme!
1. Login to your BlueHost Contol Panel: Open the welcome email and click on Login link. It will launch BlueHost login screen. Use your id and password to login to control Panel.

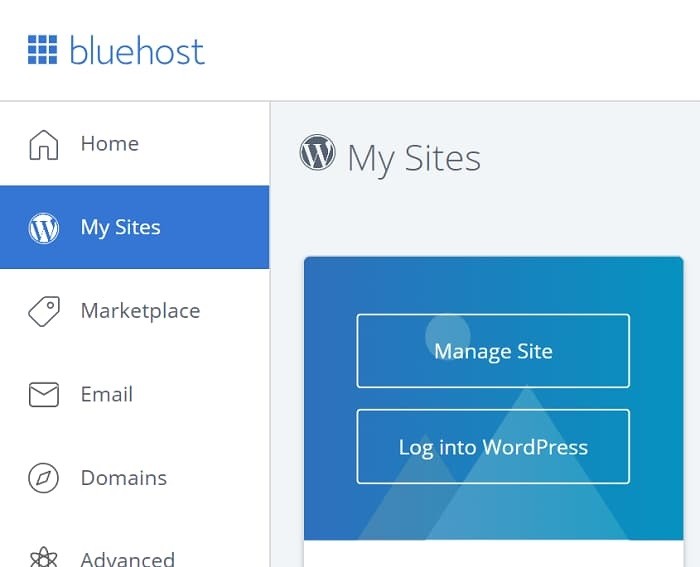
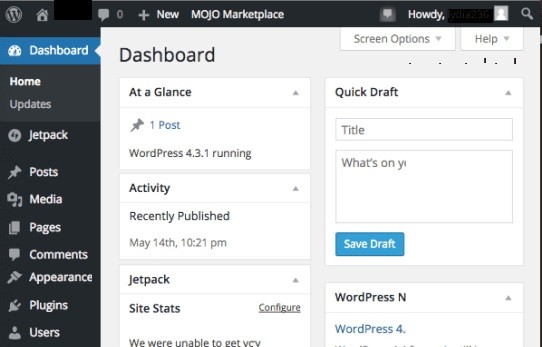
2. Click on “My Sites” and then click on “Login to WordPress” and login to WordPress. This will take you to WordPress DashBoard. This is basically WordPress Backoffice Area, where you, as an admin, control entire site!

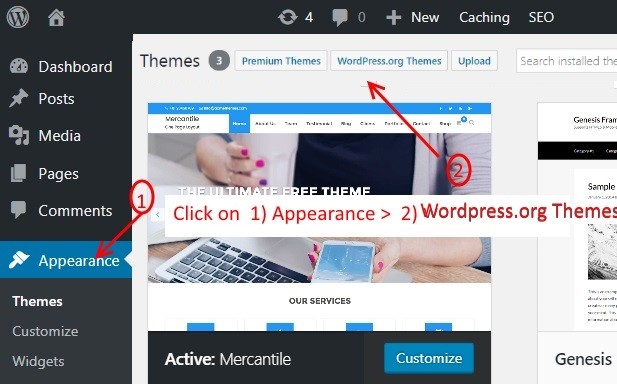
3. Let us now add that awesome theme or design template. Click on Appearance and then click on the ‘wordpress.org themes’ button.

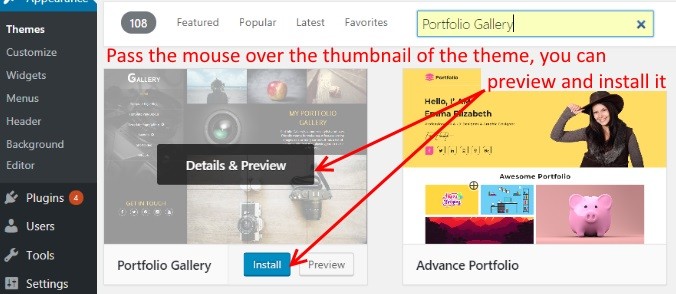
4. We will find the recommended theme Portfolio Gallery. Enter the keyword ‘Portfolio Gallery’ in the search field.


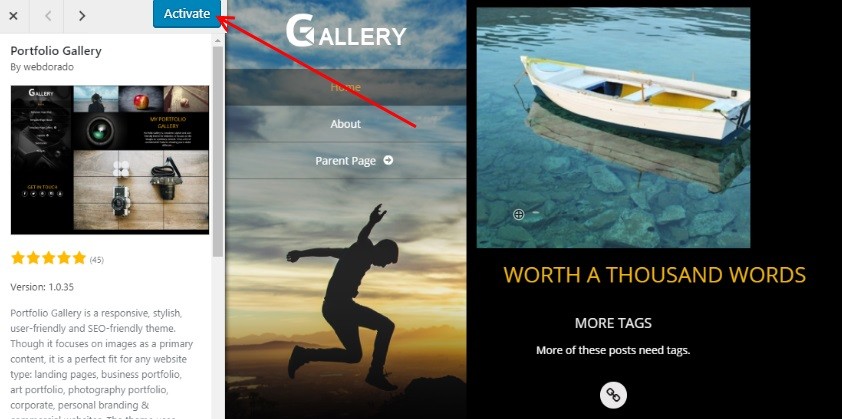
WordPress will show you the theme in search results.Pass the mouse over to the theme and then click on the Install button.

Once you have installed your theme, click on activate button.


Activate the theme.

Add Recommended Plugins – 1 minute to complete
Now that we have added your theme/design, let us add plugins that can significantly improve functionality of your website. These plugins include Sliders, which are used to setup your portfolio albums as well as WP Forms that can help you create a contact form instantly!
Please note this step below adds around 7 plugins. We will use only 2 plugins to get started with, and later once you are more comfortable with WordPress and website Dashboard itself, you can start using other plugins as well.
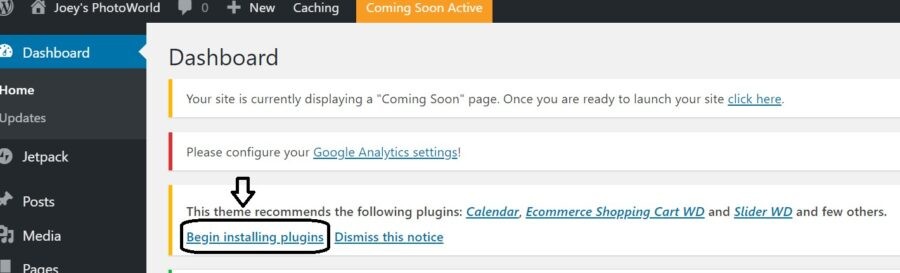
Step 1. On right side of Dashboard, you should see a message , “This theme recommends… “. Click on the “Begin Installing plugins”.

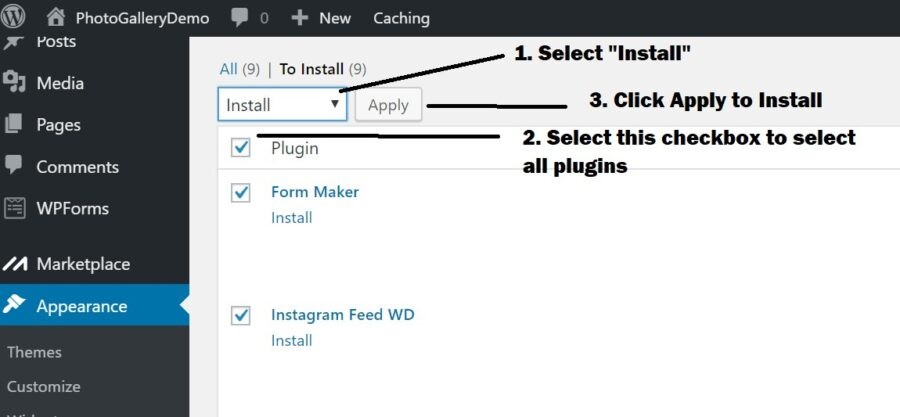
Step 2: Install recommended plugins. Now, please see screenshot below and start installing the plugins.

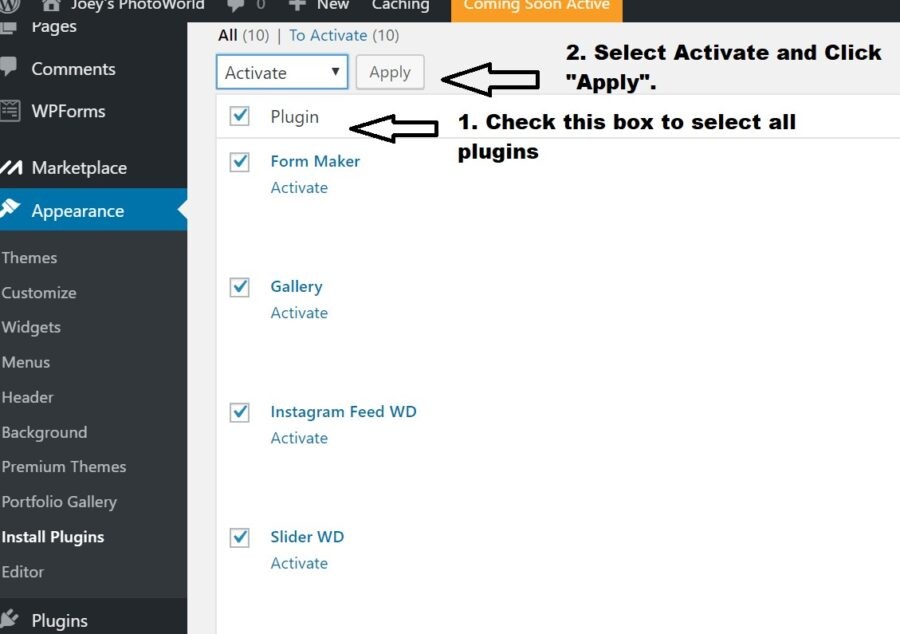
Step 3: Activate the plugins. Please see screenshot below for instructions.
After this step, you should have all the plugins activated and ready to use!

You have now successfully installed a nice theme and the recommended plugins. Good going so far!
Step 3. Setup Portfolio – Add your awesome photos!
Now that your site functionality is ready, let us do the most important THING.
Add your photos which is the lifeline your entire website!
This is a 2 part process.
Part #1 :You will create a slider, where you will add photos that belong to a particular album. For example, a wedding album. Basically for every album, you will create a separate Slider.
Part #2: Link the Slider(s) to home page so that it looks like a portfolio
Note: If you see a message with caption “Allow 10 web to collect usage data”, you can click on “Skip” for now. You can always add back options. Right now, priority is to add photos and other things can wait!
Important Note: I have added plenty of screenshots to explain process in detail. As you start reading steps below, it may sound like you have a lot to do. But it takes only a few minutes to setup a Slider. So do not get discouraged by seeing many screenshots below!
Part #1: Create Sliders
Suggestion: For each slider, I strongly suggest adding max of 8 to 10 photos in the beginning. Later once site is ready, you can always come back and add all the photos you want. Idea is to cut the time to do that initial Launch. You see, we all need inspiration. If process takes too much time, you will feel exhausted.
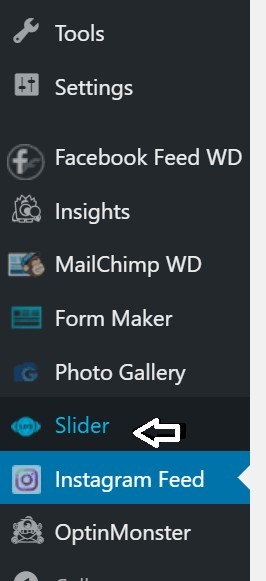
Step 1: Create New Slider – Choose Slider from Dashboard

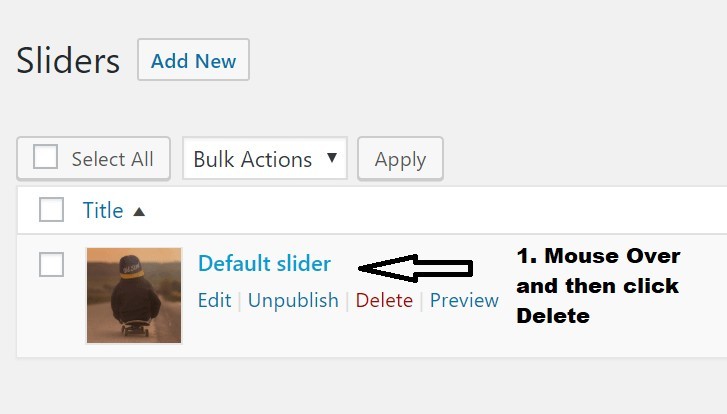
Step 2: Delete Default Slider. We don’t need it. We will create new ones.

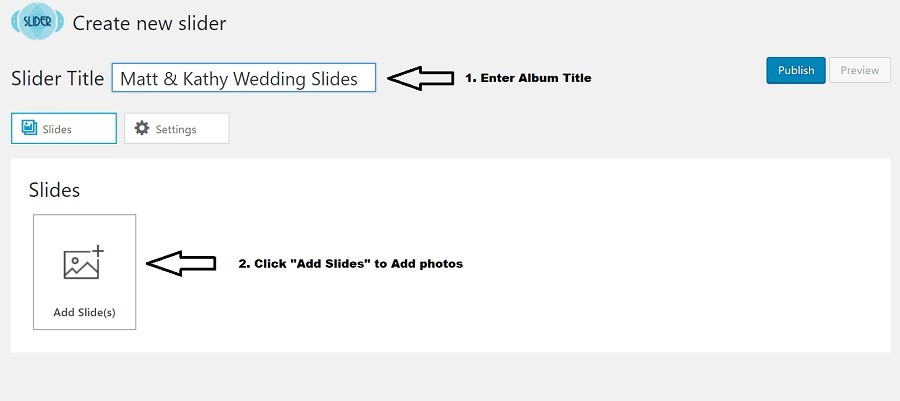
Step 3: Click Add New Slider


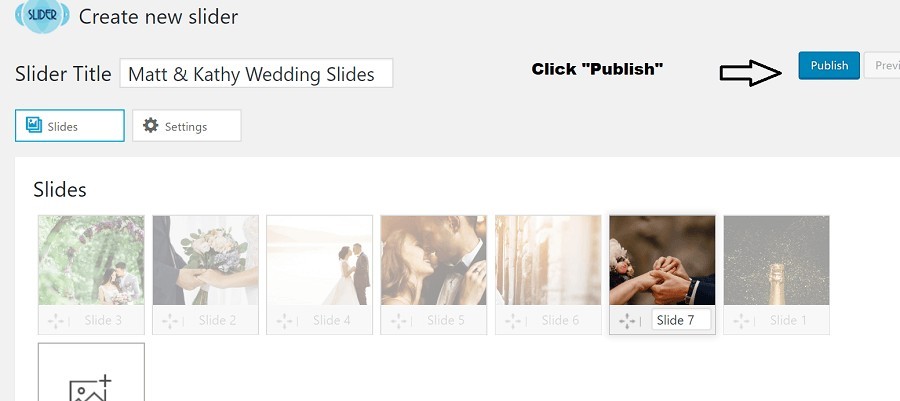
Step 4: Add New Slider Title. Then click on “Add Slider” image to add your photos that belong to this album.

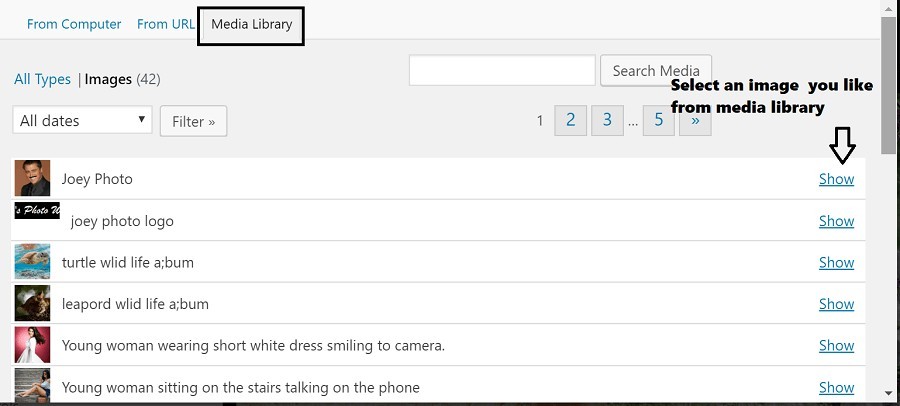
Step 5: Select Photos

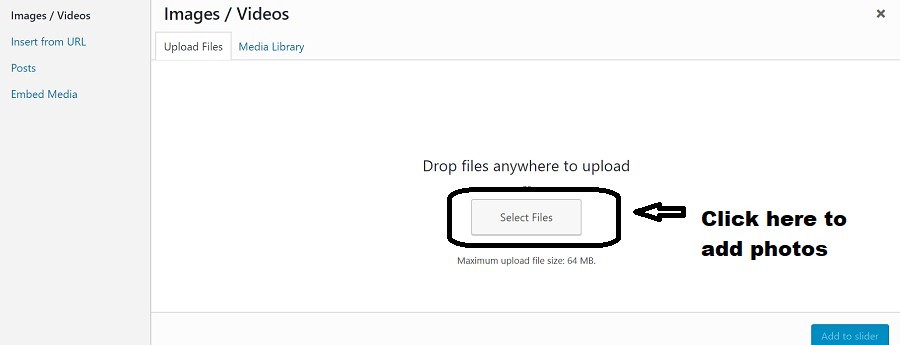
Now select your photos from your local computer and hit open button to add your photos. This step will add your photos to a media library.Select Multiple Photos and Add to Album

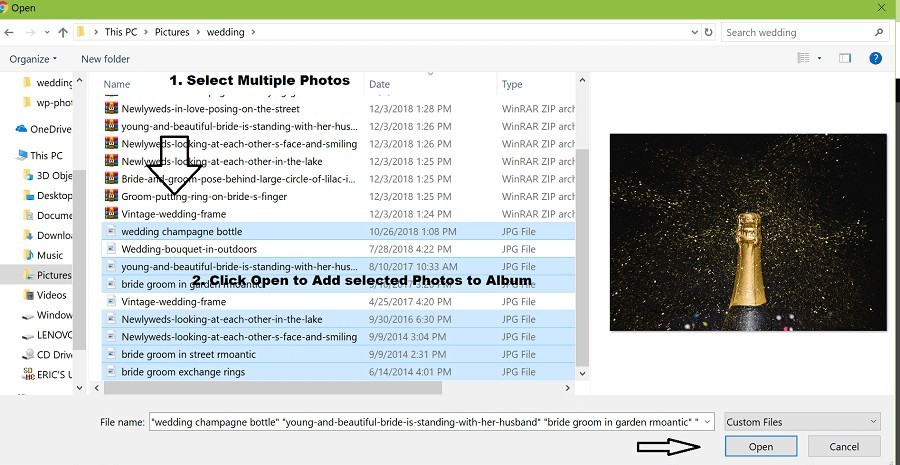
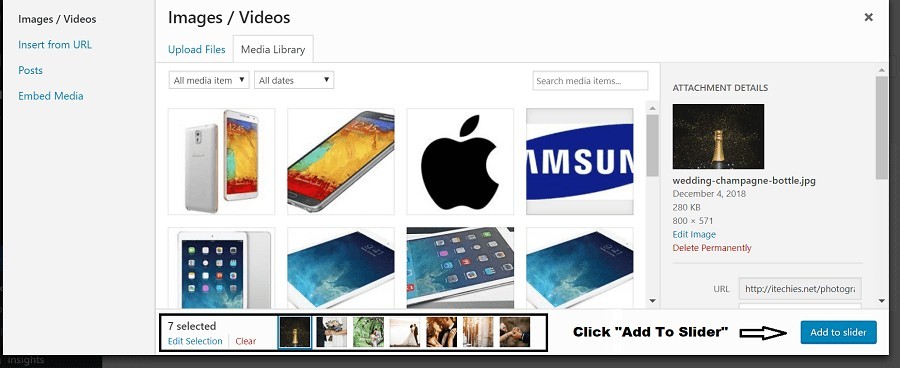
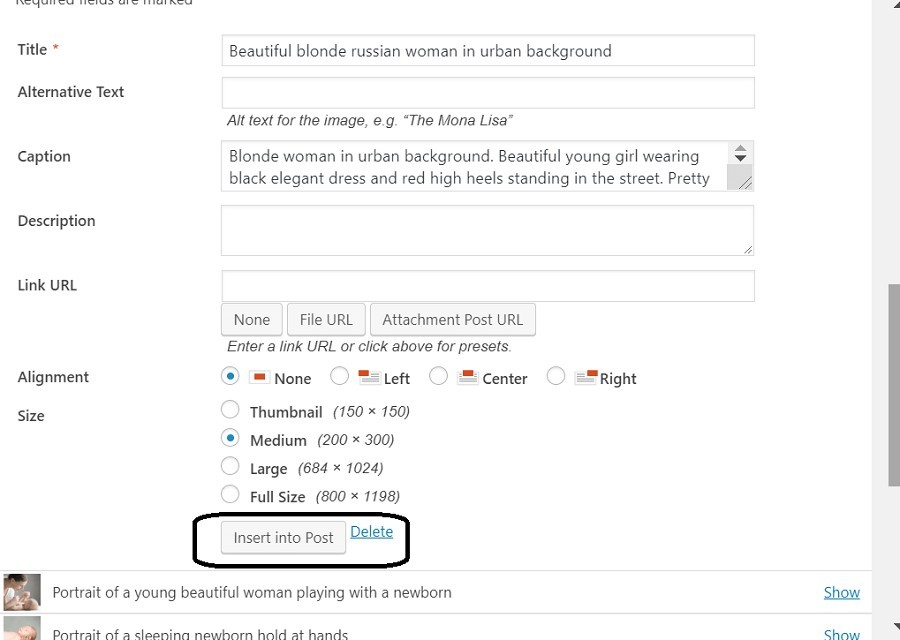
Finally, in next screen add your selected photos to the Slider by clicking on “Add to Slider” button.

Step 6: Now Publish your Slider.

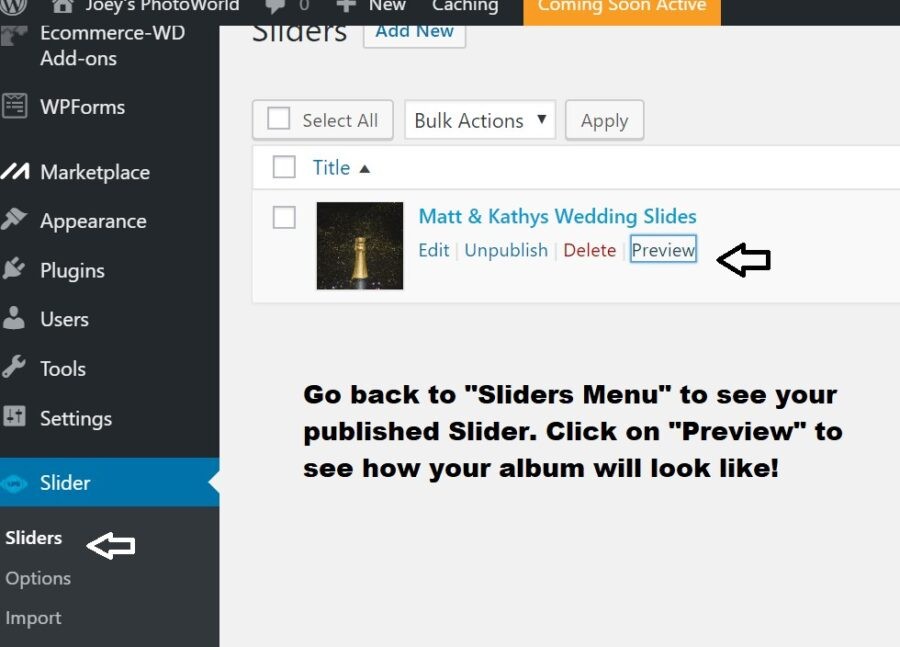
Step 7: Preview your Slider and make adjustments if you need.

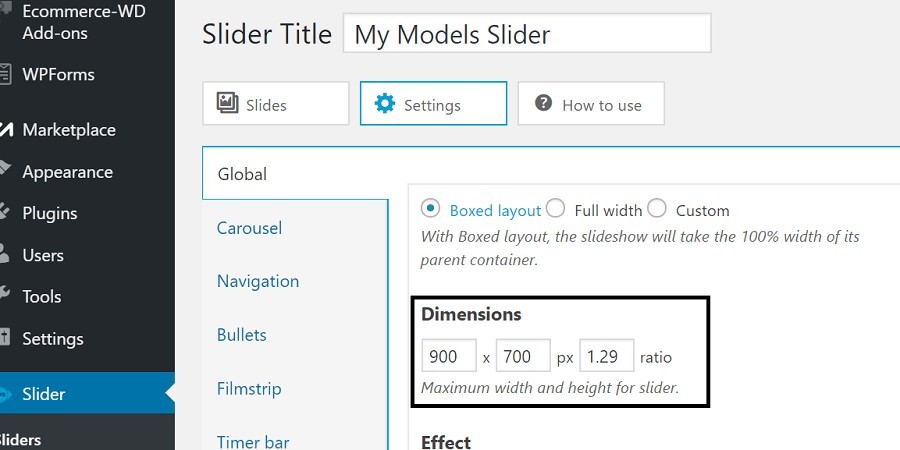
Adjust width and height of Slider if you have to: If you have large pictures, you can always adjust width and height of the slider to look better by using Dimensions setting. See settings below.

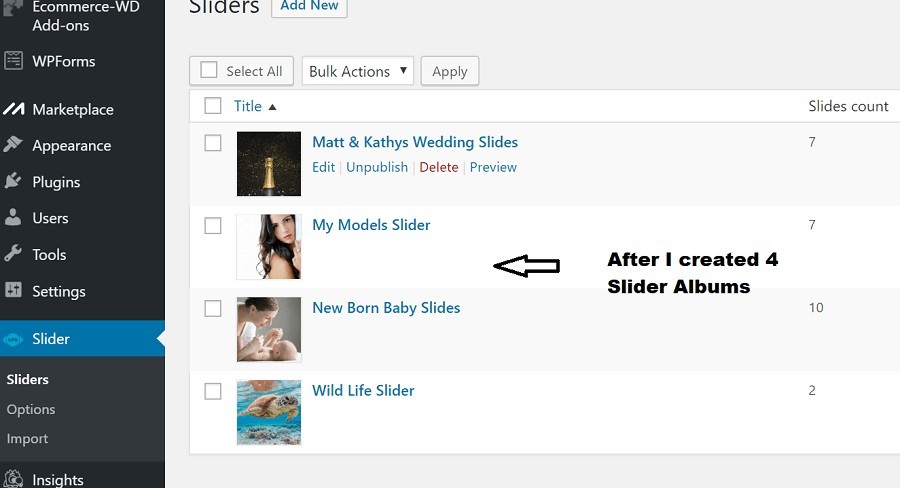
Now you can create other Sliders as well. I have created 4 Sliders as you can see in picture below:

Part #2: Link the Slider(s) to home page
Now that we added Sliders. we will create what is called as Post which will help us add your Sliders to Home Page.
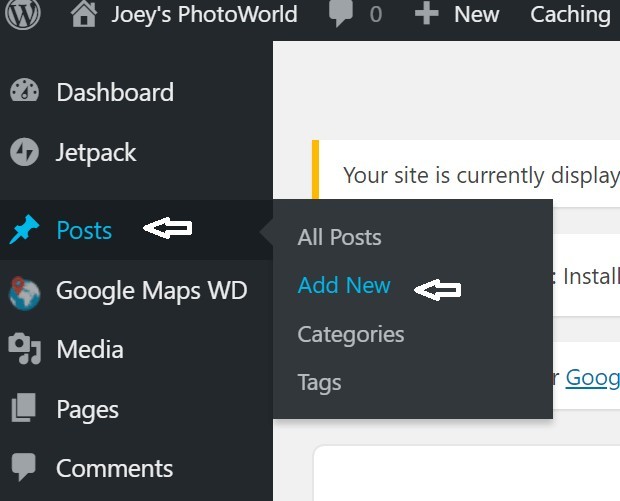
Step 1 – Add a New Post. From Dashboard, select Posts and then click Add New” to create a new Post

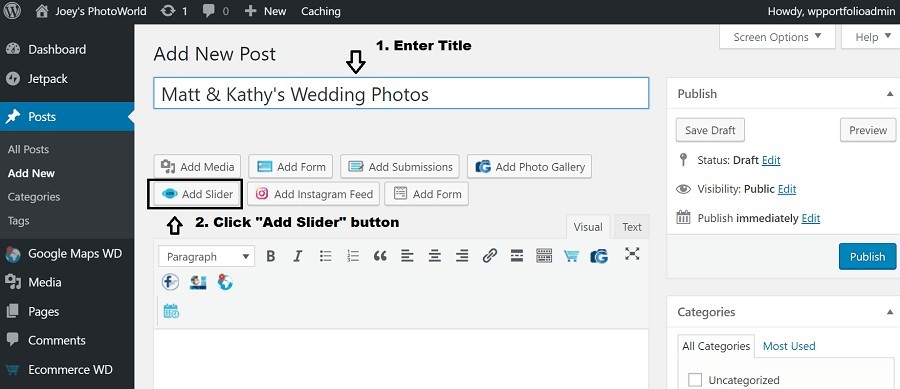
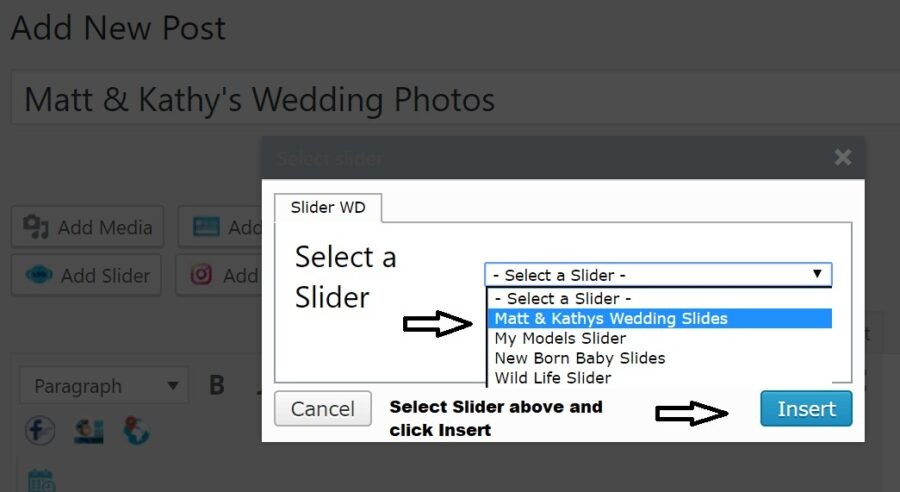
Step 2 – Enter Title and Embed Slide. Click on “Embed Slide” to choose a Slider.

Step 3 – Select a Slider and Click Insert

Step 4 – Add a featured image. We will add a featured image. This image will appear in home page that will be linked to the Slider Album. Choose any image that belongs to this Slider. Your images are already in the media library!

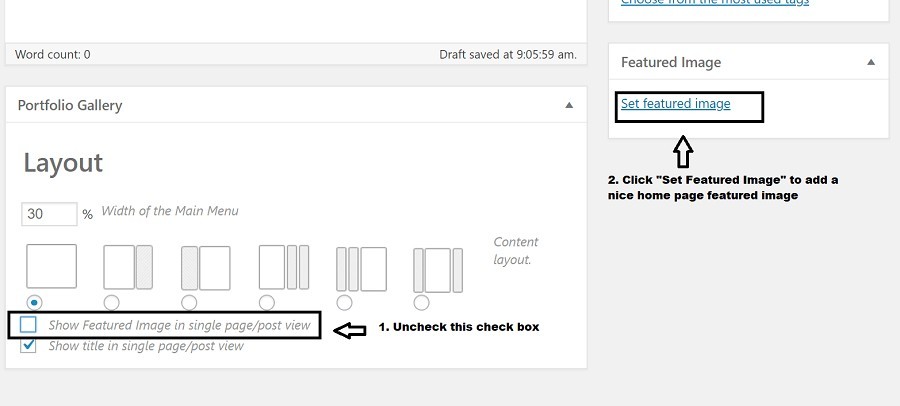
Before we add images, uncheck the checkbox “Show Featured Image in single page/post view”, which we do not need. See screenshot for details. After that click on “Set featured image” link.
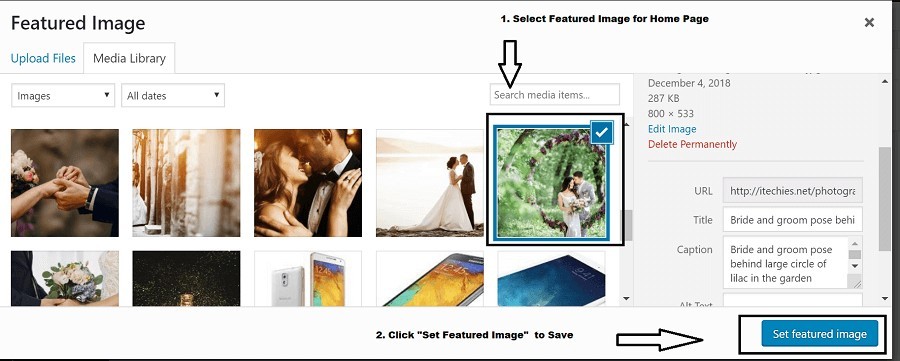
Now select your best image from album as your featured image.

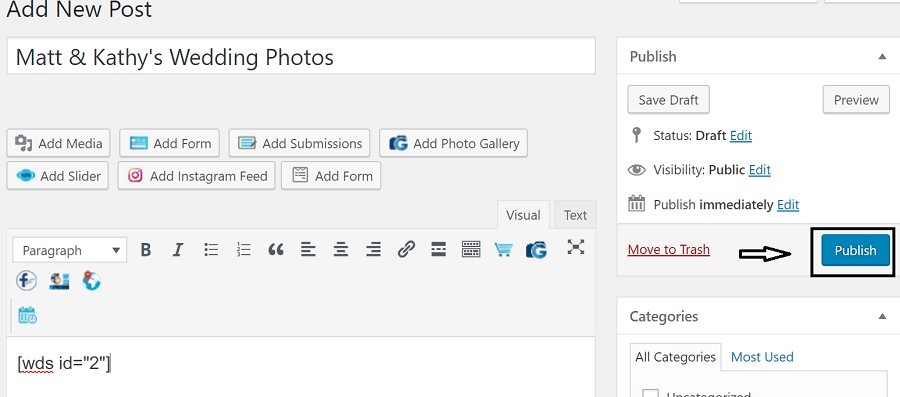
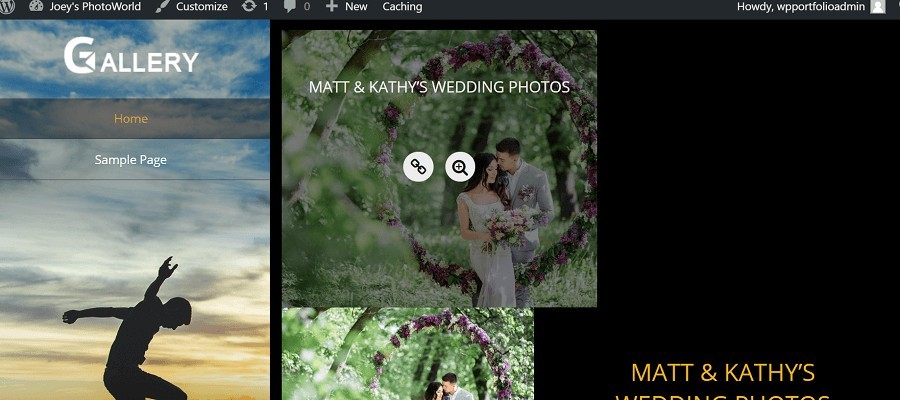
Step 5: Publish the Post. This will link the Post to Home Page. Now, make the Post Live by clicking Publish button. This will link the Post to Home Page.

Preview Home Page: You can always view your website home page if you want to. It is not complete yet. But it will give you an idea. Click on Top Site Name and choose “View Site”

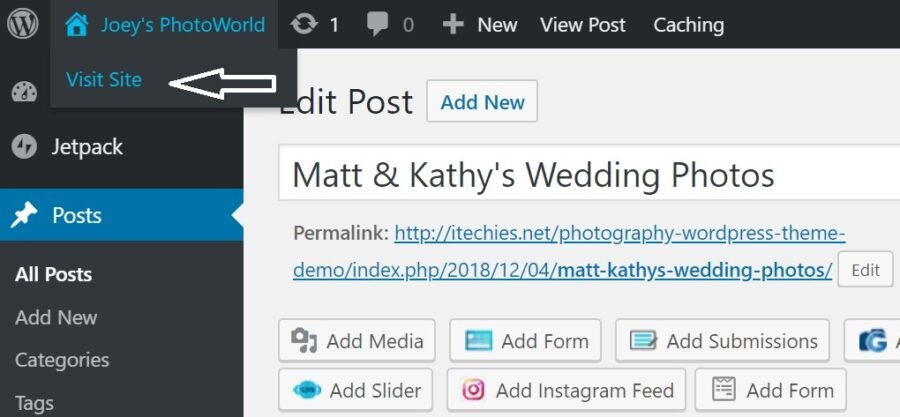

Now you can go back to Dashboard by going to Top Site name and clicking on Dashboard.
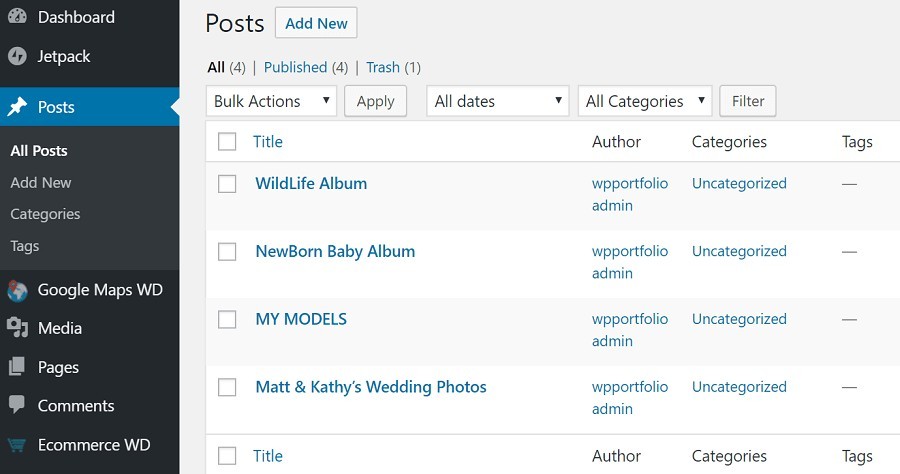
Step 5 : Add other Posts to Link other Sliders to Home Page
Since my demo website had 4 Sliders, I created total of 4 Posts by following steps above.

Optional Step: Preview Home page if you want to see how it looks like.

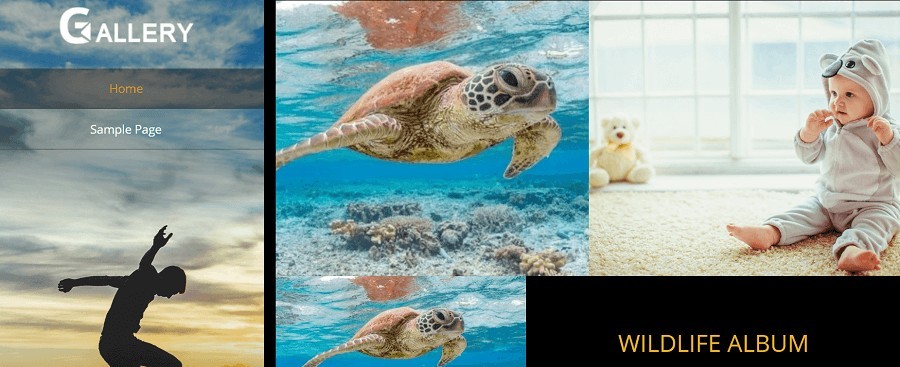
Tip: You can always switch between Dashboard and website Preview by clicking on Top Left Site Name. (You should be logged in)
Step 5: Customization – Fine tune Website settings for best look
Now it’s time to do some fine tuning so that your site looks at it’s best!
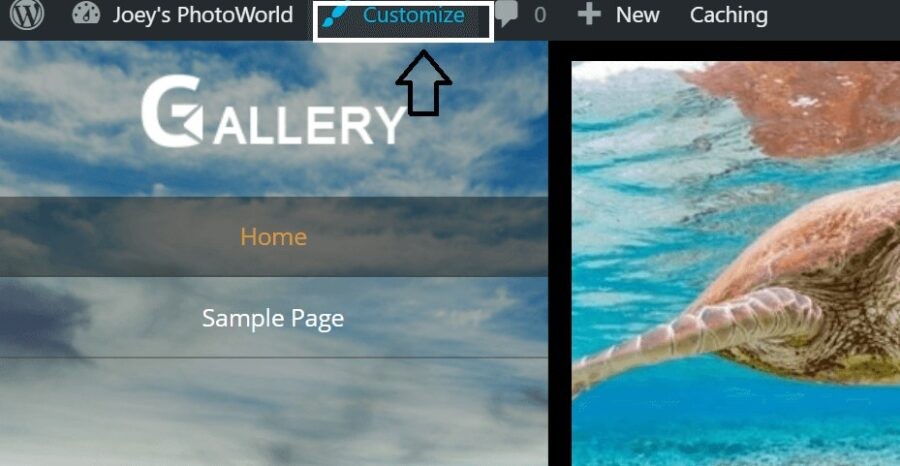
Step 1: Goto Website Preview mode and Select “Customize” from Top.(Alternatively, if you are in Dashboard, you can select “Appearance” and then select “Customize”)

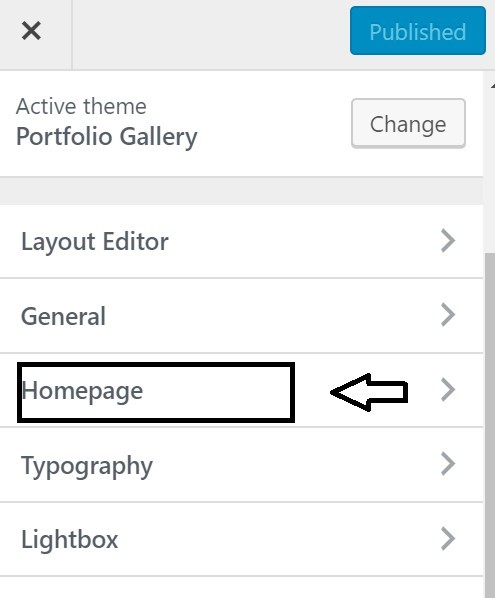
Step 2: From Customize navigation on left, select Home Page

Step 3: Disable Featured Post option
Now, click featured post to stop featured post appearing from home page.(It’s upto you. If you like it, you can skip this step. I like it without the featured post option).


Now uncheck featured post checkbox and hit Publish button.


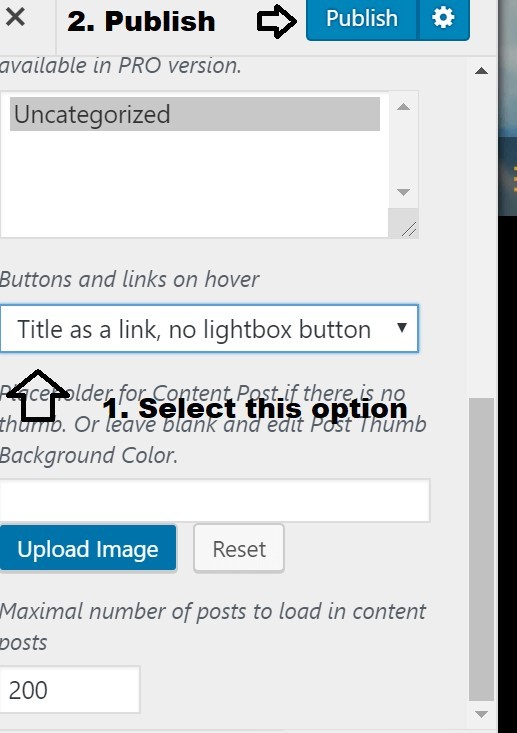
Step 4: Disable Lens and Link buttons – for each portfolio image in home page


So to remove the Lens and Link icons, follow instructions in screenshot below:

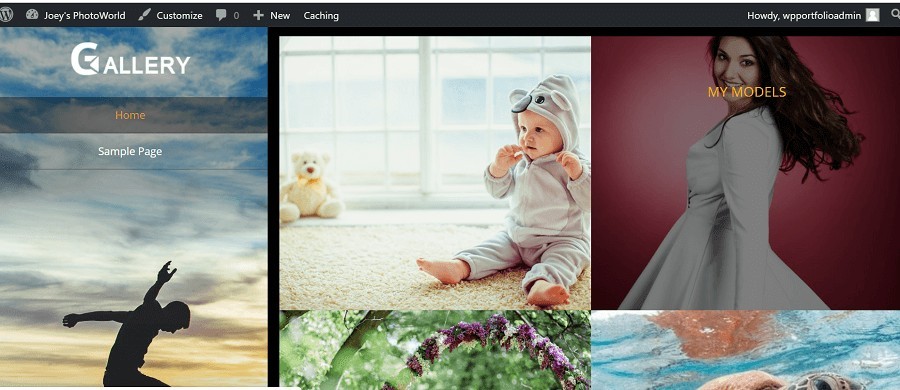
Now, this is how Home Page will look like after “Title as link” is enabled.

Step 5: Setup your own Logo image. If you don’t have image, you can set text as well.
Text as Logo: If you do not have a logo image ready, you can always use a text logo. From “customize”, choose General, then General-Main and select Logo Type as Text.


Set an Image as Logo: I used Paint in my windows laptop and created a simple logo and then uploaded as seen in screenshot below.

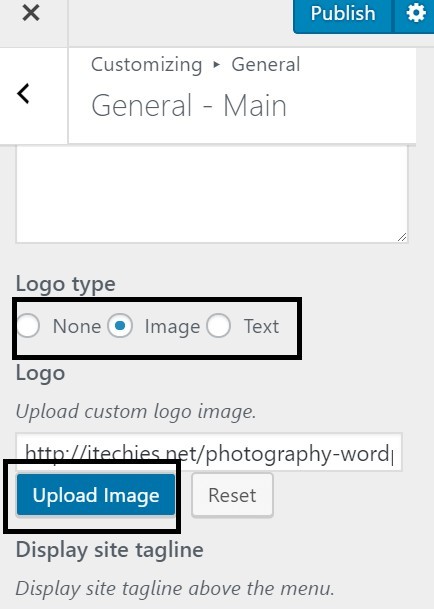
To set an image as logo, choose Image as logo type and then click on Upload Image to select your logo image. Click On Publish to save this change.
Optional Step: Setup a nice navigation background image:
I wanted to replace the man jumping image with my own image. So I replaced the existing background image with your own background image. Since I already had uploaded plenty of images to my media library, I chose from one of them as in screenshots below. But you can always upload a new one, if you want to.
From customize Goto General, General-Media, and choose options below:

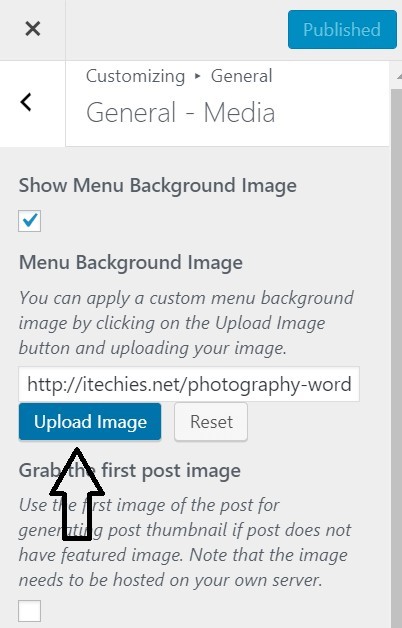


Don’t forget to click “Publish” to save your changes.
Now your home page looks like what you see below:


Step 6: Almost there! Add a About Us page and Contact Us Page
Any website needs an About Us Page and a Contact Us Page. Let us create these two. It should be completed in a few minutes.
How To Create an About Us Page:
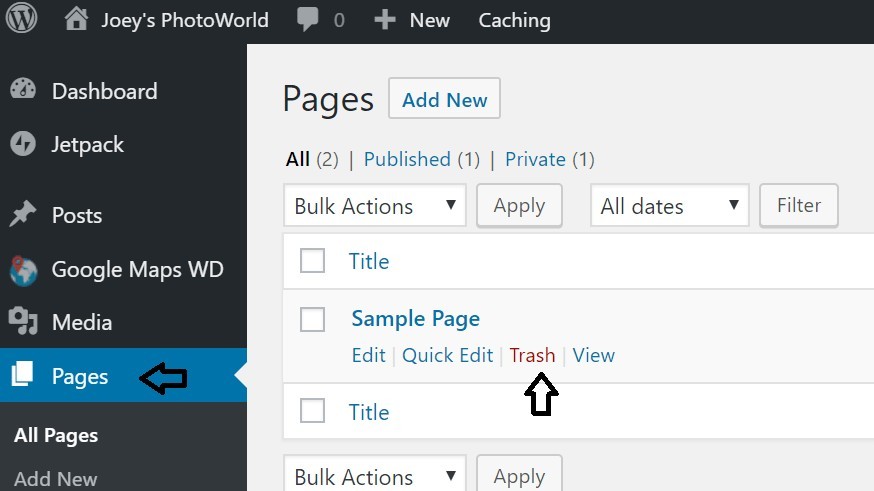
Step 1: Open Pages. Remove Sample Page
From Dashboard, select “Pages” and then delete the “Sample Page”. See screenshot below for instructions.

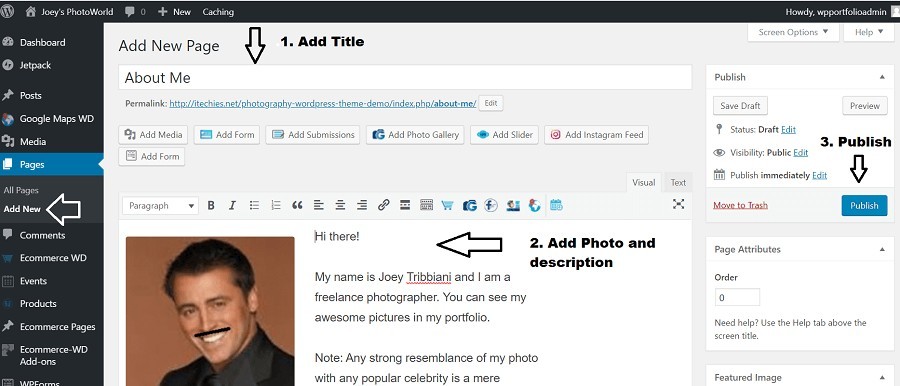
Step 2: Create New Page.
From Dashboard, under Pages. click “create New”. Now add a title. Enter your nice photo and add a nice description. Finally hit “Publish” button.

Your About Page is now live and the About Us link is automatically added to home page navigation bar on left side! You can Preview your Website if you like to.
How to Create a Contact Us Page
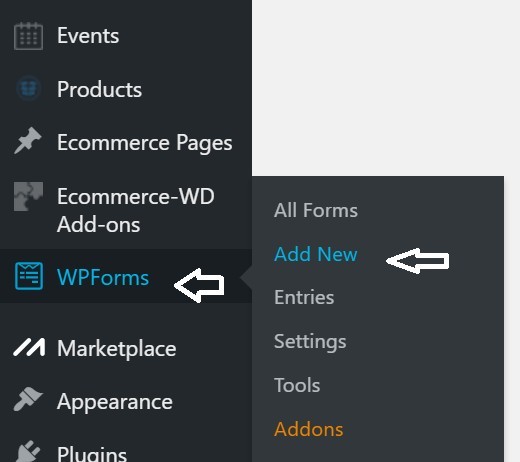
Here you will see the power of plugins. Creating a contact us form is so easy. We will make use of WP Forms plugin. which we have already installed.
Step 1: From Dashboard, select WP Forms and then select Add New.

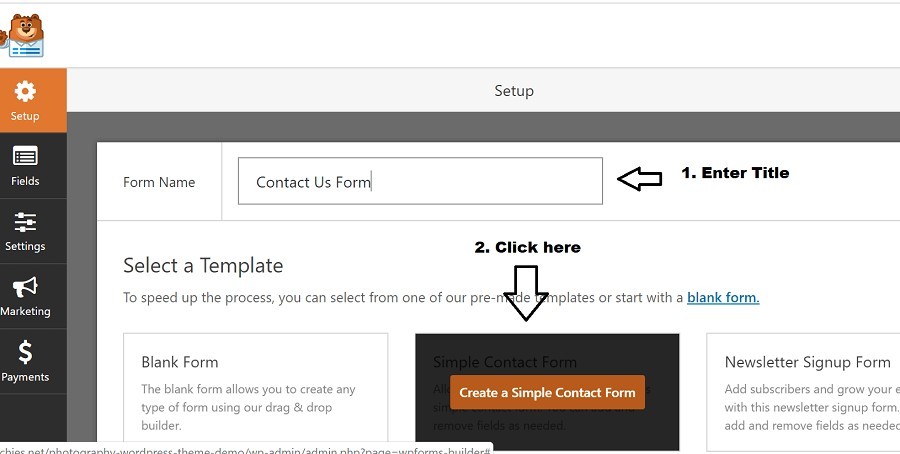
Step 2: Enter Form Name and then click on “Create a Simple Contact Form” box

Step 3: You can see WP Form Fields. Now click Save to save the form
You can see the contact us form fields here. The default form has all the fields a normal contact us form needs. But you can add more fields or you can change the form to the way you like. It is very user friendly! Finally don’t forget to click Save.


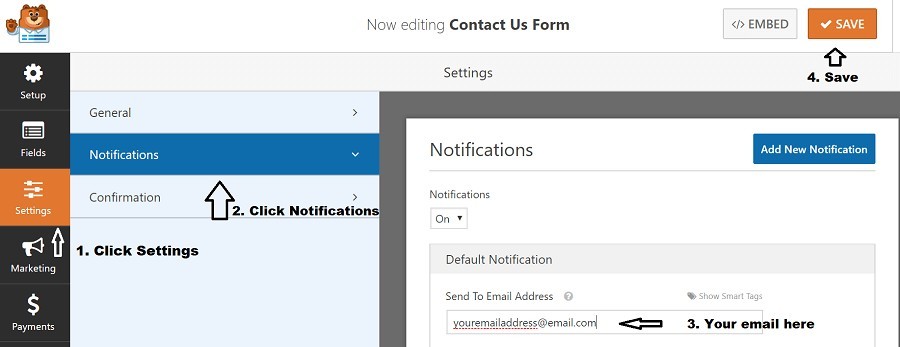
You can see WP Form Fields. Now click Save to save the formStep 4: Update settings to add your email. All queries from Contact Us form is delivered to this email address.
Now let us goto form settings and enter your email address. All customer queries from your contact us form will be delivered to this email address. So make sure you update it.

Step 5: Now Create a New Page and embed the Contact Us WP Form into this new Page

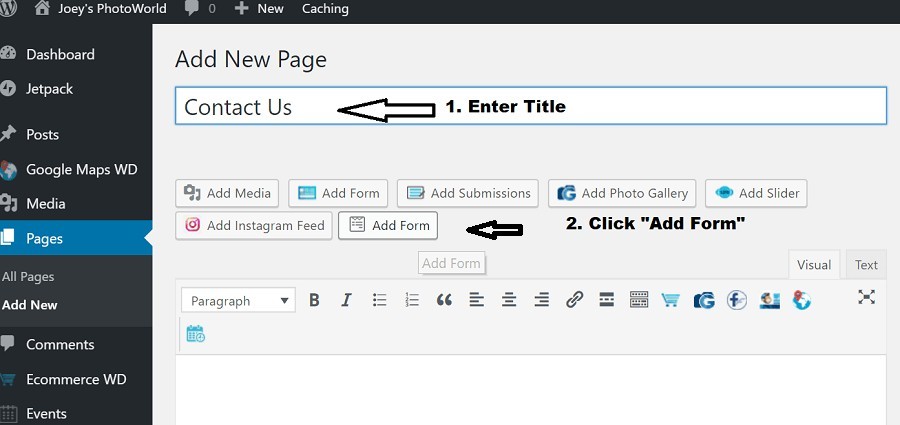
Now it is time to embed your WP Contact Us form into a Page. So let us create a new Page and embed the form as shown below.
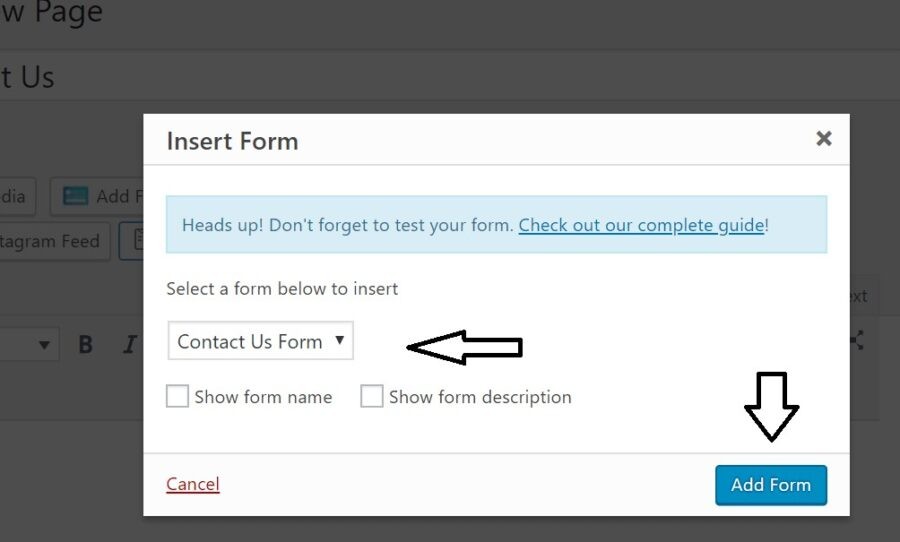
Step 6: Under “Select a Form”, select “Contact Us Form” to embed the wp form into page
Select your WP Contact Us form and click “Add form”. Easy Peasy!

Step 7: Now Publish Contact Us Page to make it live

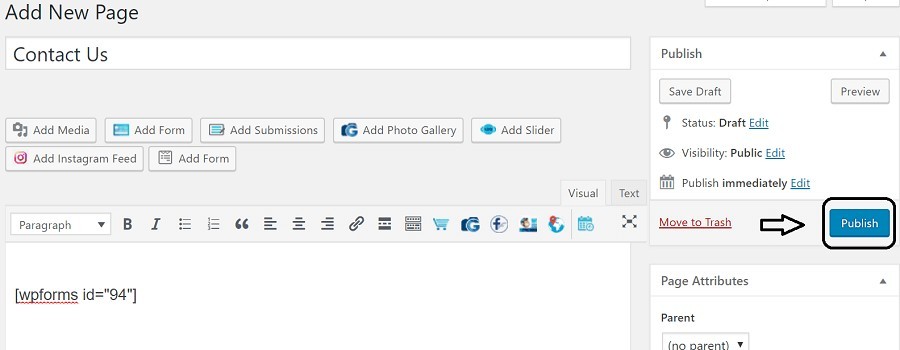
Step 8: Contact Us link is added Automatically to Navigation menu. Test the form
Once you publish the page, if you preview your website now, you will notice the “Contact Us” page link is automatically added to left navigation bar!

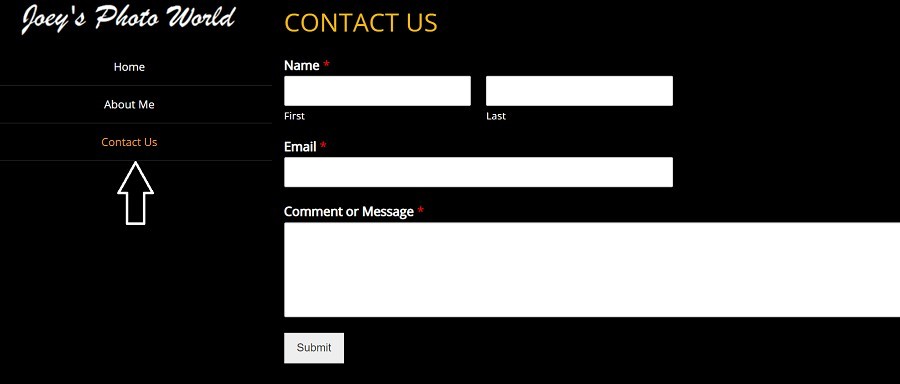
Test your Contact Us Form: Now test your contact form by entering your email and other fields and hit Submit. Make sure you get your email in your email box. Sometimes, it may be delivered to your Spam folder. If that is the case, make sure you whitelistthe email sender.
Congratulations! Your website is ready!


You have done some hard work and you got a nice photography website live.
Over to you: Bonus Tips:
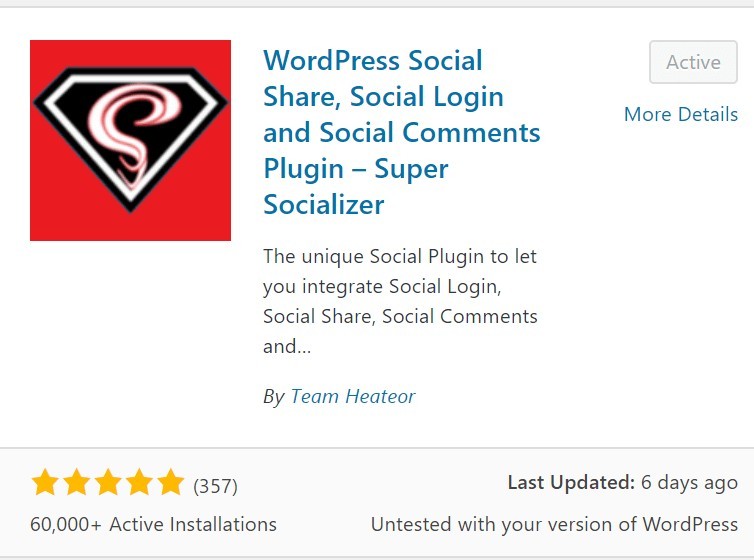
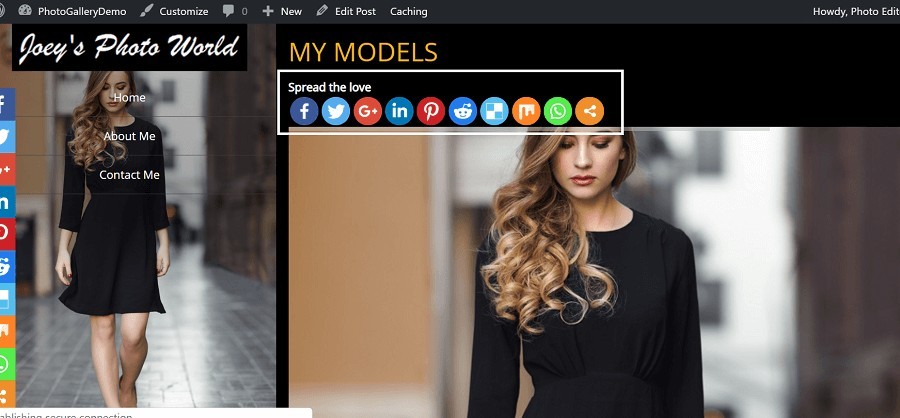
Now that you know how to install plugins, you can install a nice plugin called Super Socializer, which will add a nice social bar to your pages.


Please share this article 🙂
We worked so hard and took lot of time to create this guide. I would appreciate it if you could share this article in facebook or twitter or Pinterest. You can even add a link to your photography blog once it is live! 🙂
Contact Us for doubts: We will be adding more tips to this article. Like how to add a blog to this photography website. If you want it now like yesterday, shoot us an email to contactus at findbestwebhosting dot com ( replace at with @ and dot with . – this is to fight email spam from those nasty email robots)