

Live chat is one of the best ways to engage with your website visitors and answer their queries. However, being on call 24X7 is impossible for a single person to do. In addition to this, sometimes you need to deal with multiple queries in a single time, which can lower your productivity. Here Chatbots can help you immensely!
Chatbots enable businesses to automate some crucial parts of their conversations. At a bare minimum, these chatbots can save you time by weeding out all the unwanted queries that do not need a person to answer them. In this blog post, we will talk about when it makes sense to use a WordPress powered chatbot and how you can add one to your website in just 3 steps.
Here are a few stats to show you importance of Chatbots:
- 53% of companies who identify that artificial intelligence as a tool for creating ‘customer-first culture’
- 70% of the millennials are reporting positive chatbot experiences
- 86% of customers believe there should be an escalate to agent option when talking to a chatbot
- 57% of businesses agree chatbots deliver a large return of investment with minimal effort
- 90% of businesses reporting faster resolution of complaint with bots
- $0.70 is the projected chatbot cost savings per interaction of customer
- $3.9 trillion projected AI-derived business value growth by the year 2022
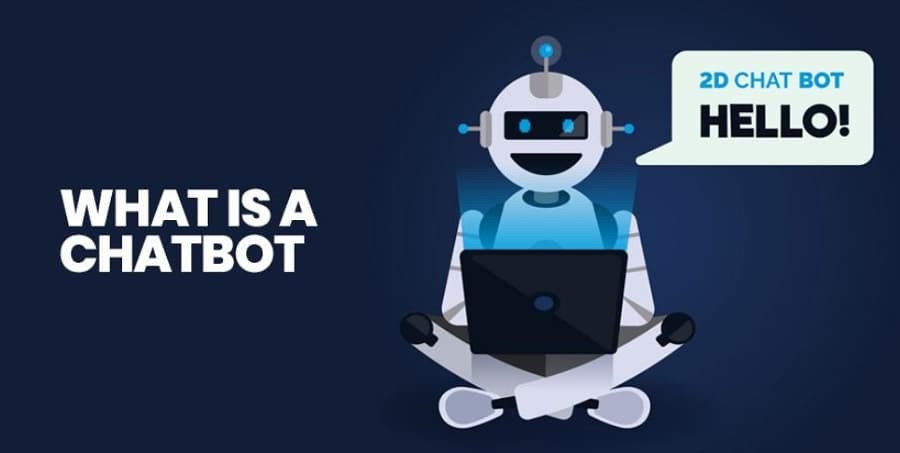
What Is a ChatBot?
As the name implies, a chatbot is a program designed to chat automatically with the users through a live chat. Ideally, your chatbot should aim to “sound” as possible in life in order to simulate the experience of talking to a real person.

When you think about chatbots, your mind turns to artificial intelligence (AI). There are a plethora of chatbots that use deep learning in order to improve their accuracy to answer and skills. However, in most cases, when you encounter a chatbot in the wild, this will respond using a set of fonts occupied by specific keywords.
Practical Applications:
Currently, chatbots are no substitute for humans. Although with its limited functionality, chat software has a lot of practical applications for web apps, such as:
- Address key customer support inquiries. Your chatbot should be able to discover keywords related to the client issues and direct them to the information they are needed to be solved.
- Direct customer inquiries. If you have more than one person dealing with direct chat requests, it may be easy to move users back and forth depending on your area of expertise. Chatbot can act as receptionist and filter requests for specialized professionals.
- Chatbots can be especially useful for service and e-commerce sites. These outlets usually have to spend a lot of customer inquiries, so having an additional tool to help you cope with the workload is a smart move.
However, creating a chatbot is usually not as easy as writing out and communicating potential answers daily. There are many platforms that enable you to create functional chat groups that you can integrate with your website.
However, most of them have a steep learning curve. In other words, it may take a lot of work to program useful chatting, even if you are not creating the program from scratch – the place where the following services come in.
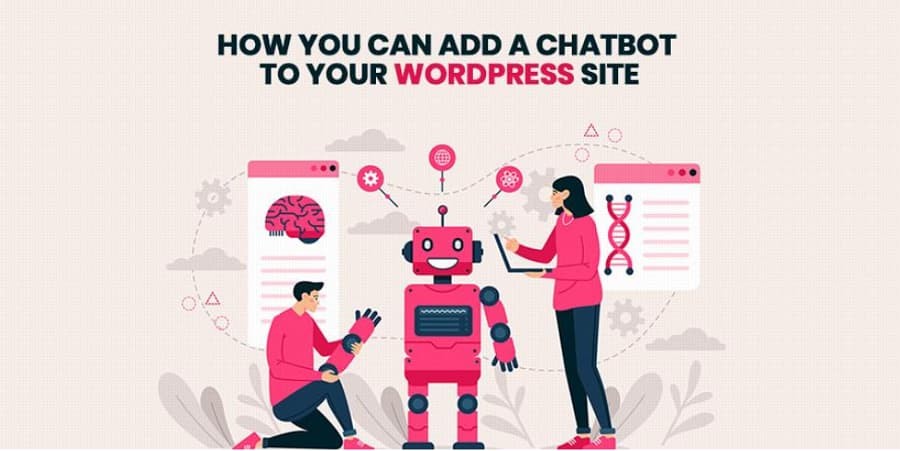
How You Can Add a ChatBot to Your WordPress Site?
To activate and start chatting on your website, you will need to use a third-party service to create it, then find a way to merge the two together. In this section, we will focus on how to withdraw integration with chatbot powered by Facebook. Let’s go to it!

Step #1: Set Up Facebook ChatBot
Creating a chatbot on Facebook is easier than doing. The process can be complicated depending on how you deal with it. For example, if you know your way to Python, you can use it to create your own chatbot through Facebook API.
Fortunately, there are many third-party services that you can use to create Facebook chat sites without any programming knowledge at all. In fact, there are dozens to choose from. With this in mind, we’ve looked at some top options and here are some recommendations:
Chatfuel: This service enables you to configure your chatbot using pre-created blocks, similar to the way Divi modules are used. You can use the service for free, although it includes the “Made by Chatfuel” trademark.
Manychat: This platform provides you with analyzes of any links you include in chatbot messages, letting you monitor conversions.
It’s Alive: If you want to use the chatbot chat builder with an elegant interface that’s easy to configure, Alive is a great place to start.
You can see more options here:7+ Live Chat Software and Help Desk Software
Feel free to do some research on other chatbot chat creators on Facebook, as you’ll probably spend a lot of time with whichever you choose. Once you have chosen, you can work on your chatbot and bookmark this article so you can move on to step two after it’s ready.
Step #2: Integrate ChatBot With WordPress
Once you have a fully functional chatbot, it is time to integrate it with your website. The easiest way to do this is to use a plugin and in this case, we recommend using WP Chatbot for Facebook Messenger.
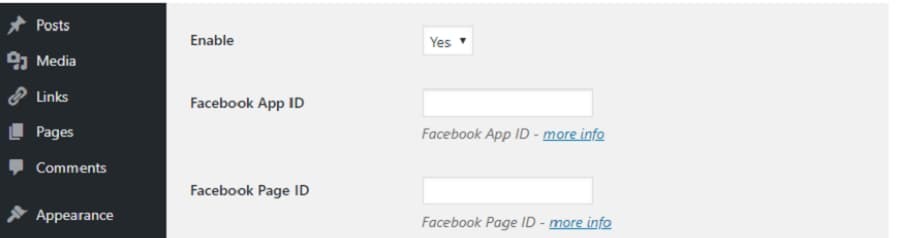
As far as plugins go, this one is downright simple to configure. Install and activate it as usual, then go to the new WP-Chatbot tab in the WordPress dashboard. First, you’ll need to add the Facebook application ID of the chat robots and the corresponding page ID. Without this data, the plugin wouldn’t work at all:
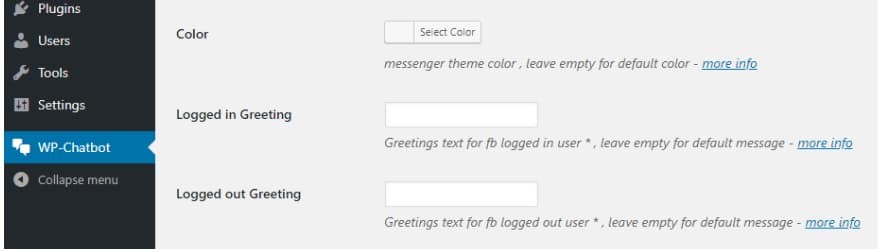
The process of finding and entering these identifiers works the same way regardless of whether or not you have used a third-party service to create your own chat. WP Chatbot for Facebook Messenger also allows you to set a default color for your message screen and define how your bot should receive visitors:


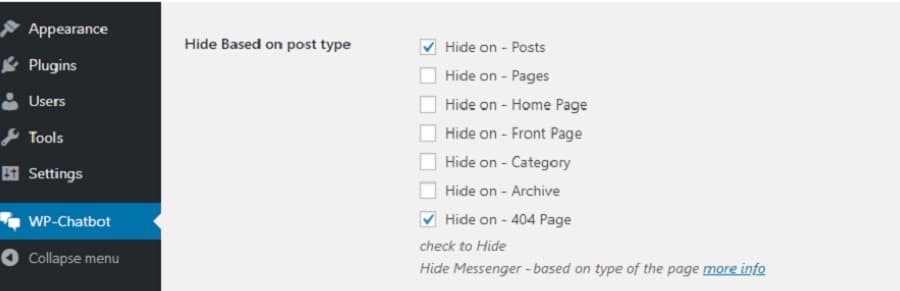
Upon proceeding, you will also need to configure pages where chatbot should not appear. Most people add chat sites to their homepage, but you may want to hide your posts from posts and 404 error pages, for example:
It may also be a good idea to disable WordPress’s chatbot for mobile phone users as it may take up a lot of space and force them to close it before they can navigate your site.

Finally, we recommend setting the ‘minimize’ option to ‘default’. This will configure WordPress’s chatbot to expand the first time someone visits your website. Once closed, it will be displayed on its future visits to a minimum.
This takes into consideration all plugin settings, so go ahead and click the Save Changes button and let’s take a look at the results.
Step #3: Test Your Facebook Chat Bot Through WordPress
There are many benefits to testing Chatbot as soon as possible. You can do this as part of the first step, and improve his behavior when your potential customers start using it. For now, your main concern should be whether your WordPress site is loading your chatbot as intended and if it connects to Facebook successfully. Here is an example of a chatbot that we created on one of our websites.
If chatbot identifies you as being logged in to Facebook, it means that it is connected to the platform as intended and that you are fine. However, if your chatbot doesn’t work, there is probably a problem with the corresponding Facebook app, so go to the platform and check if it works.
If so, check to see if you’ve added the correct app and site IDs during the second step. Then, chatbot WordPress again tested the integration process is simple, so there will be chances without any crashes the first time.
Conclusion
If you use live chat on your website, you will likely handle a lot of inquiries. The more messages you have to answer, the more time you will eat. In short, using Chatbot is an effective way to handle customer questions with simple answers.
If you still have any issues related to chatbot integration, you can hire a WordPress development company in India. These companies provide the best WordPress Development Services with the help of WordPress Plugin developer. And, they can also help you in creating customized WordPress plugins as per your specific needs and requirements.