Enabling SSL within DotNetNuke is a VERY easy process. This tutorial assumes that you already have an SSL certificate installed to your site. If you do not have an SSL Certificate installed to your site you can contact your hosting support for assistance in purchasing and installing an SSL Certificate to your site. (Or read cPanel SSL Installation Instructions). Here are the simple steps to setup SSL in a DotNetNuke Site.
- Login as the Admin or host super user account
- Go into Admin > Site Settings > Advanced Settings > SSL Settings
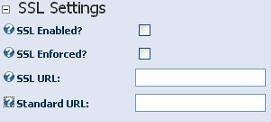
- You can see different options. SSL Enabled, SSL Enforced, SSL URL & Standard URL.
How to configure SSL within DotNetNukeTweet This
Check SSL Enabled to enable SSL on the front end pages. If you check SSL Enforced, a secure page will ALWAYS be visited via SSL and an unsecured page will ALWAYS be visited via standard HTTP. This ensures that users are ONLY on SSL for a long as needed.
You can see 2 other text fields SSL URL & Standard URL. If you are using private SSL you can leave these 2 fields blank. However, if you are on shared hosting and do not have your own SSL certificate you can specify a third party SSL path that will be used when accessing the site via SSL. NOTE: If you have specified an SSL Url you must specify the “Standard URL” that a user will be returned to when they are taken away from the SSL protected pages.

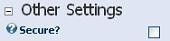
Starting with DotNetNuke 4.5.4 a new feature was added that would allow SSL support for specific pages. When adding/editing pages within your DNN 4.5.4 (and later) website you will now notice one additional “Secure” setting under the Advanced -> Other settings. This individual setting actually enforces the SSL requirement for a page. If a page has this option selected it WILL be transmitted via SSL for EVERY request.