
Did you know that WooCommerce powers nearly 28% of all online stores over the web?
WooCommerce is powered by WordPress. With a beautiful theme and WooCommerce plugin, you can convert WordPress into a fully-fledged digital shop.
Proof? Big sites like ThinkGeek.com are using WooCommerce.
Want to know the best part?
You can put your blog and e-commerce store together.
Most successful ecommerce stores use blogging as part of their overall traffic strategy. A blog helps you establish your authority in your niche area.
Now:
In this tutorial, we are going to show you the necessary configuration options to set up your site and add products to it. It explains how to create an online store with wordpress (and using WooCommerce plugin)
We assume that you already have a domain name, your web domain is set up on a web host and you installed wordpress there. Else you can follow our guide How To Start A Successful Blog In 10 Simple Steps.
Get started quick with a high performance WooCommerce hosting package that comes Preinstalled with WooCommerce. SiteGround, a trusted hosting partner is offering a preinstalled WooCommerce high performance hosting account.
Get a WooCommerce account (Preinstalled) for just $3.95 per month
How To Set Up a WordPress Ecommerce Website manually
Here are the 4 steps for creating that awesome online store.
- Install WordPress Ecommerce Plugin
- Install a Compatible Ecommerce Theme
- Add Products
- Edit your store setting
Install Your Ecommerce Plugin
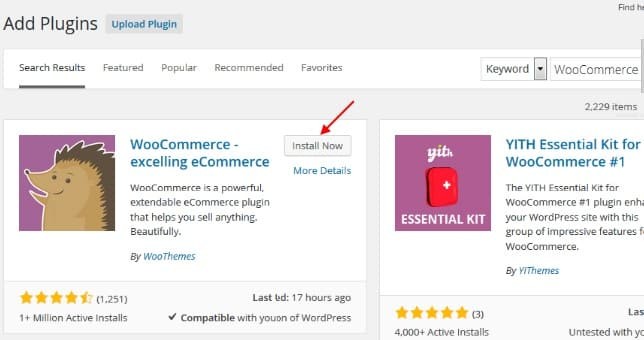
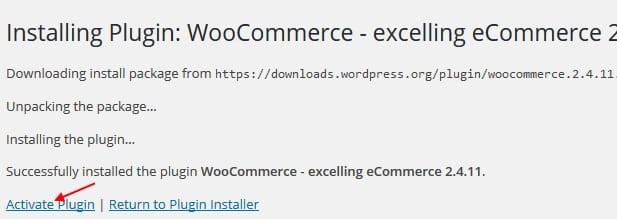
- From your WordPress Dashboard Navigate to Plugins >> Add New. Search for WooCommerce, and simply install and activate WooCommerce by WooThemes.
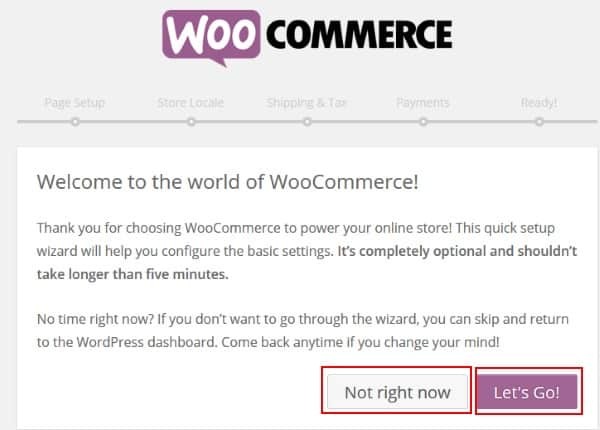
- After activating your plugin, you’ll get 2 options, Either go straight into the store Settings, or skip store settings and go back to dashboard. I recommend you to skip store setting and go to dashboard and tie up a few loose ends first.
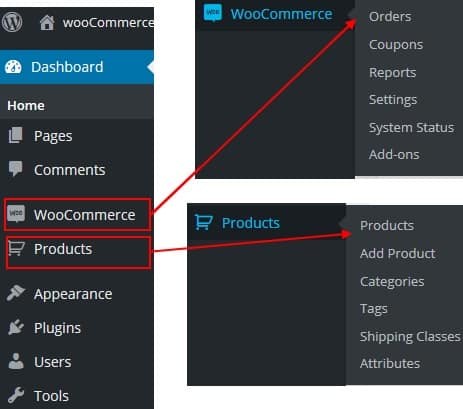
- Now in your dashboard, you can see 2 new menu links on left sidebar. Woocommerce and Products. This is where you edit your store settings and products.
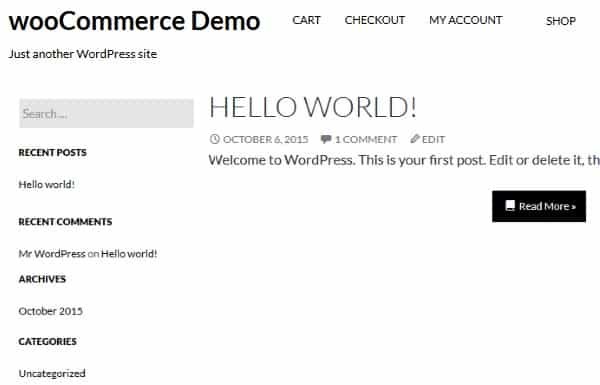
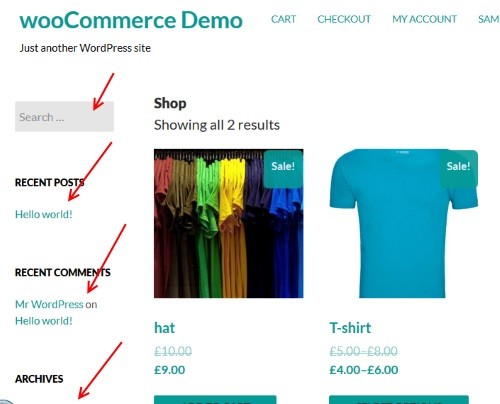
- If you visit you site now, it looks like some standard wordpress blog. First let us change your wordpress home page to shop style. Right now when a visitor arrives at your site, they will see latest posts from your blog. Follow these steps to set up a homepage that displays products and product categories to visitors as soon as they land on your website.
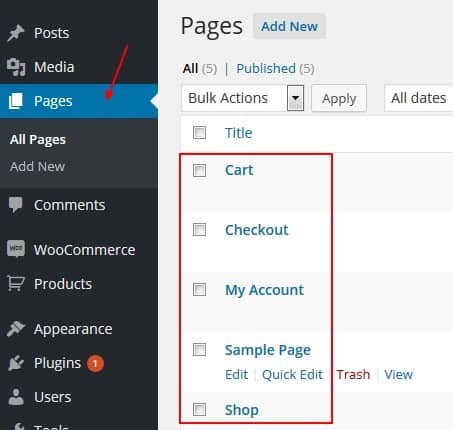
- WooCommerce adds some standard WordPress pages.Your visitors don’t see it yet.
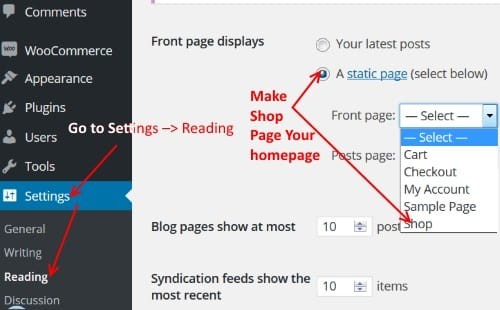
- You can go to the Settings –> Reading and make shop page as your Homepage.


Install Your Ecommerce theme
Get excited for the next step! You are getting there 🙂
Now:
Let us choose a theme that will give your store a stunning appearance.
Get a Compatible WordPress Theme ans install it
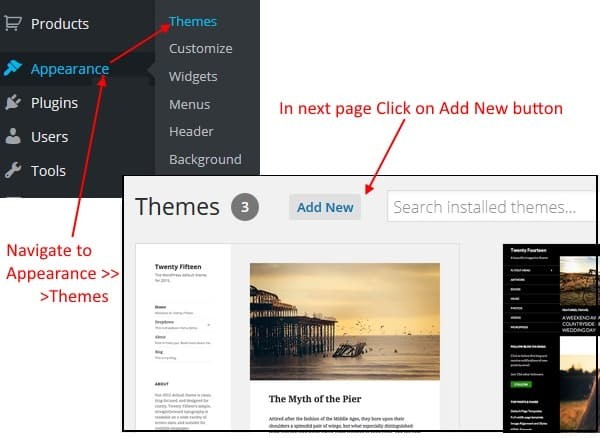
- Go to Appearance >> Themes. In the themes page click on ‘Add New’ button.
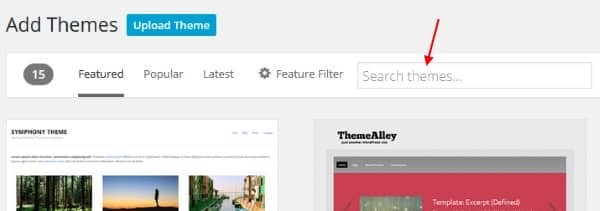
- Search for a WooCommerce theme.
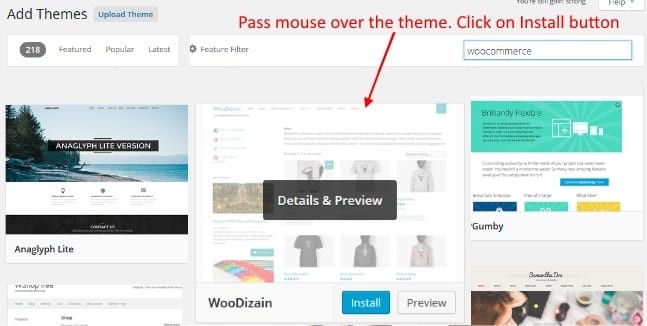
- Select a theme and install it.
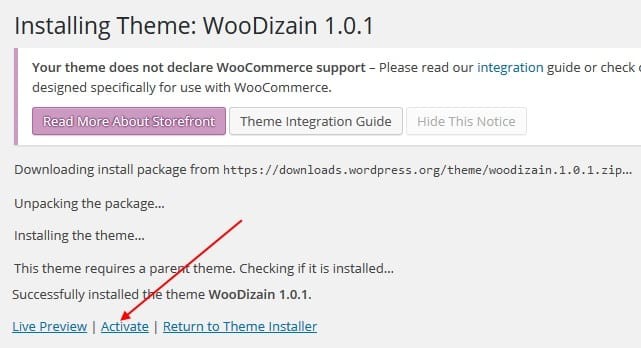
- Activate the theme


Add Products to your site
You have a nice theme. Now lets start adding your products.
Let us add some products and see the layout. You can sell physical or digital products through your store.

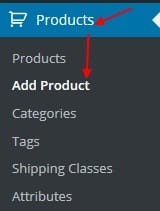
- From your admin dashboard navigate to Products >> > Add New. (or view All Products if you are editing an existing product that you have previously created.)
-
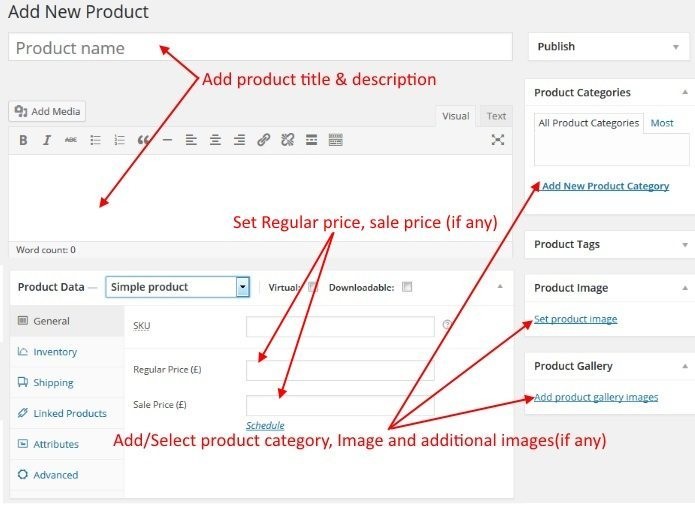
Product Name, Product Description, product image, Product category….
Enter name your product in the main title bar, add information about your WooCommerce product in content editor, select product categories and tags, upload a small image to the featured image (Try to make this image as square as possible), Upload more images to image gallery, and enter price of this product.
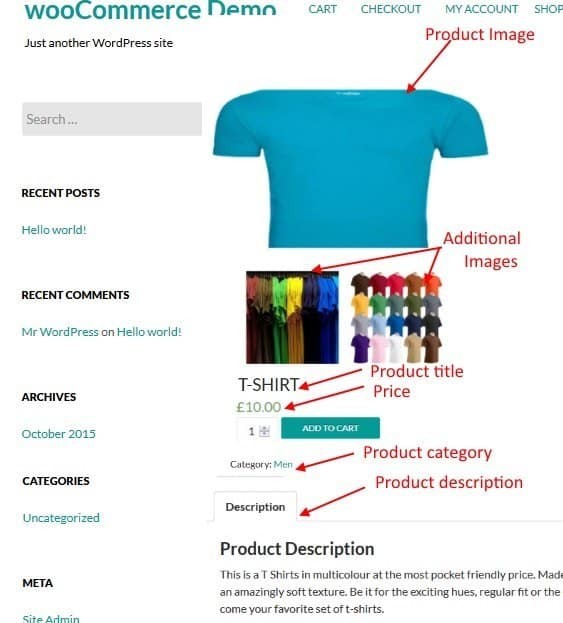
- Now that we have entered basic information for our product, go back to your shop and preview the product.
- Now let us fill in the technical details about our product.
- To begin, what is the nature of your product.
- Is this a physical product or a digital downloadable” product?
- And if it is a physical product.
- what are shipping options?
- Is there any sale price for this item?
- What is the amount of stock you have?
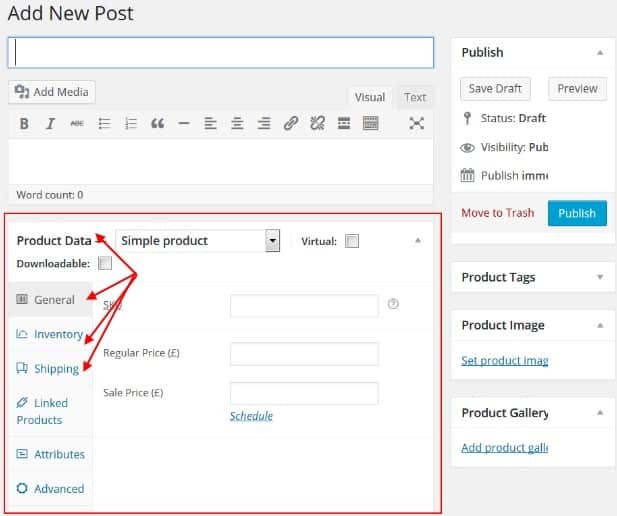
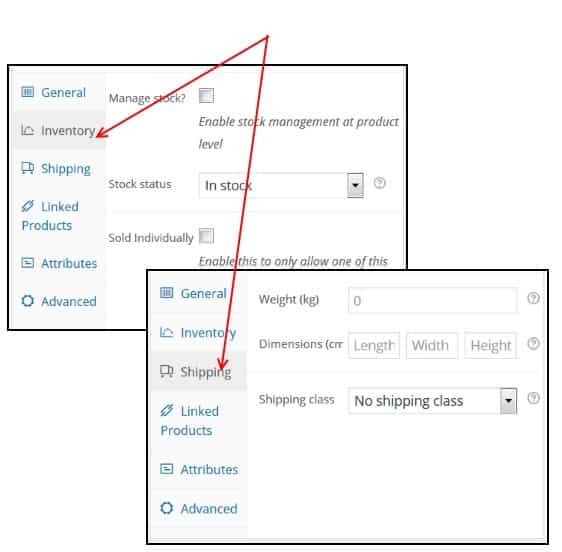
- You can set all these in product page. Come back to editing page, scroll down to description area. You can see
- Product Data
- General
- Inventory
- Shipping
- Linked product,Attributes, advanced ect.
- Click on each tab on left to set up your values.


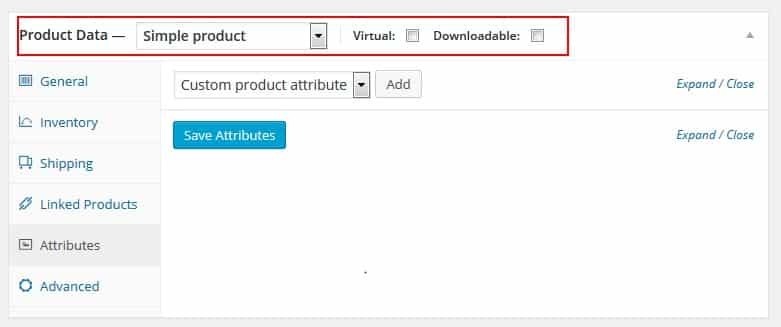
Product data – What type of product(s) you are going to sell?
Wow! You are so close now to launching that dream store. Hang on ..
Based on the type of your products, there are addditional helpful options you can choose.
Do you have physical product or digital good(“downloadable” product)?
Do you have simple product or variable product?
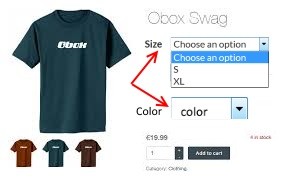
Do you sell different variations of your products? For eg. If you sell different colors and size of T-shirt, then this product is variable.
If not, it is what WooCommerce refers to as “Simple”.
Here are 4 variations.
- Simple Physical Product – a single physical product that has no variations.
- Variable Physical Product- You can set different variations on a product. For e.g. a product like a shirt, where you can offer a large, medium and small and in different colors. You can add different prices, image and more for each variation.
- Simple Digital Product
- Variable Digital Product
Scroll down to the area titled Product Data.

How to create variable product?
For example, I’m going to add different size for this T-shirt.

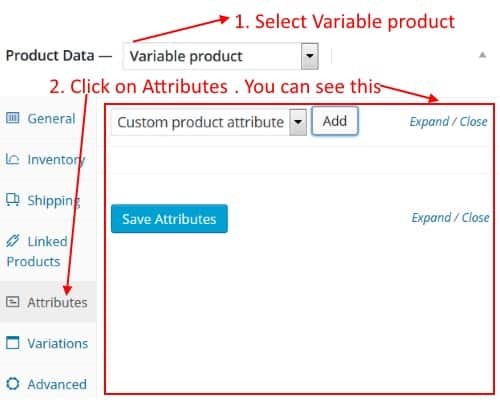
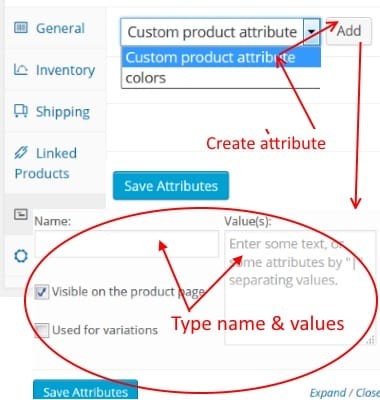
- Select “Variable Product” from the Product Data dropdown. Go to the Attributes tab on the left .
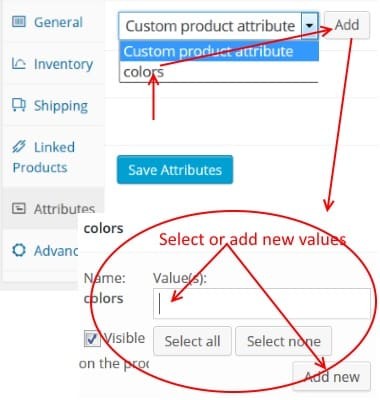
- Add the attributes- Click on custom product attribute drop down. Here you can also see existing attributes. Since there is no size attribute, I’m going to add new attribute (e.g. size). See Fig below.
- Note: This step is optional. I’m going to show how to edit existing attribute?
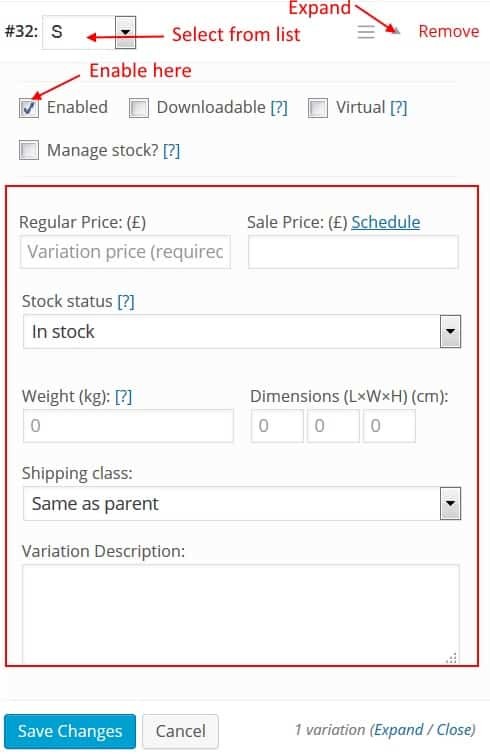
- Go to the Variations tab on the left and “Add Variations” for each included Term you selected in the previous step. For each term, you will want to click the box to “Enable” it and if necessary click manage stock to manage the individual stock levels of each variation. To do so, first click on arrow to expand it and make necessary changes. You can edit Price, stock quantity,Image of product,Shipping class and more. See fig below.


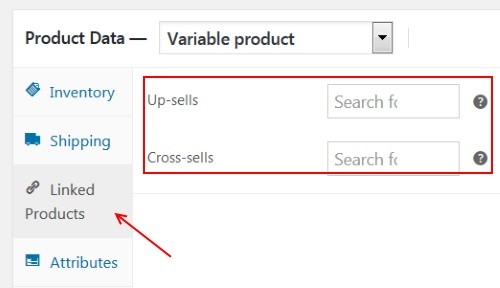
What are Linked products / related products? Up-Sells and Cross-Sells
Look:
Cross-sell and Upsell are sales techniques whereby a seller induces the customer to purchase more expensive items or other add-ons.
These items are recommended along with the currently viewed product.
Up-sells show on the product page.

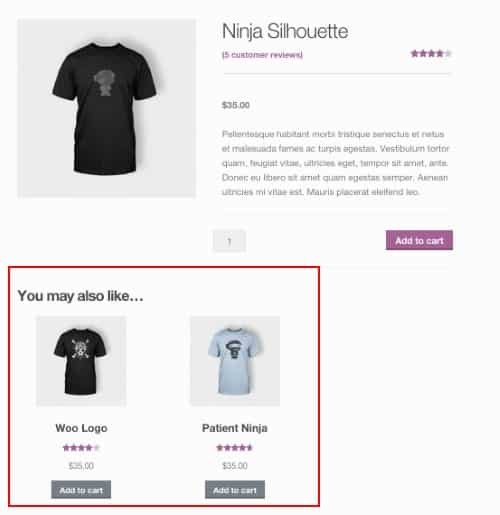
Cross-sells are products which you promote in the cart, based on the current product.

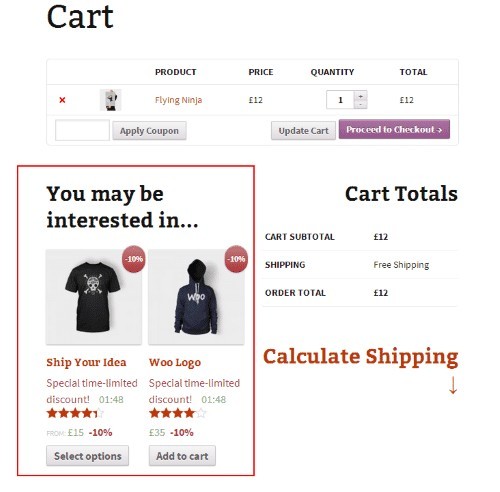
Click on “Linked Products” tab in Product editing page. You can see Up-Sells, Cross-Sells there.
Back to top

Set up store
Now let’s see how you can set up your online shop.
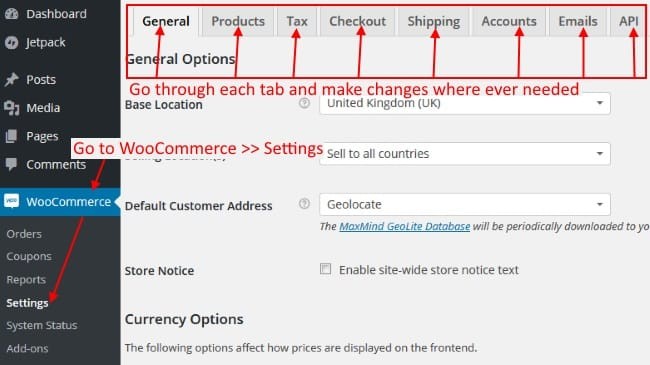
- From your admin dashboard navigate to WooCommerce >> Settings. The settings page is divided into several tabs. Go through each tab and make changed where ever you need. Most of the Settings are self-explanatory. Go through the settings and customize it to improve the experience for your customer. After making changes in each tab, remember to click the ‘Save Changes’ button.

Here let me explain some helpful setting tips.
- Change Size of WooCommerce Image Thumbnails
- Go to wpadmin>> WooCommerce>> Settings. Click
on the Products tab at the top (See image above). Directly below those options, switch to the Display tab. - Under the Product Images section, you will find the Catalog Images, Single Product Images, and Product Thumbnails dimensions which is calculated as Width X Height in pixels.* Catalog Image is for your images on the shop page and for shortcodes. Single Product Image is for your images on the single product pages. Product Thumbnail is for your smaller product thumbnails for widgets.The images you upload to products will be resized to match the values you have input here. If your settings are 100×100 and you upload a 300×600 image it will be resized to 100×200. You can also choose to ‘hard crop’ your images which will force them to be the size specified in these settings, regardless of the raw image you upload, but will be cropped rather than distorted in scale.
- Once you have made your changes to the image dimensions, click ‘Save Changes’
- Go to wpadmin>> WooCommerce>> Settings. Click
- Set up WooCommerce Shipping
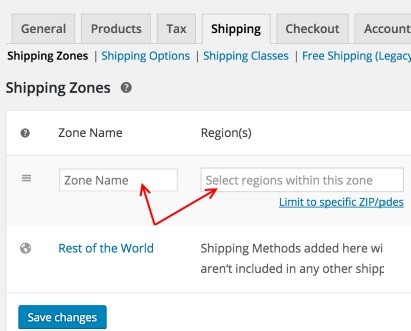
You need to add a Shipping Zone with shipping method in it.- To start, go to: WooCommerce > Settings > Shipping. Directly below those options, you can see 3 links:Shipping Zones | Shipping Options | Shipping Classes .
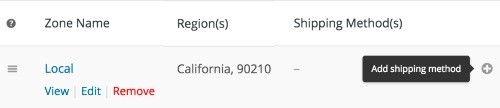
Add a new zone - On first visit, there is a prompt to add a new zone, and a default Rest of the World zone. Enter a descriptive Zone Name, and select regions that apply to this zone. Regions can consist of: Countries, States or Continents.Add shipping methods to zones
Click the + icon on the far right of each row.
- To start, go to: WooCommerce > Settings > Shipping. Directly below those options, you can see 3 links:Shipping Zones | Shipping Options | Shipping Classes .
- Create WooCommerce Promotions
- Create a Sale: You can create a sale on specific products right while creating a product.
- Add Coupon Codes: Add Coupons and Coupon Codes in your site. For example: Here is an example of a coupon code page… ipage coupon code page, that lists a coupon code for a popular web hosting company. As you can see, coupon codes are highly converting and similar to this example, you can add many coupon codes to your WooCommerce store..
- Set up your StorefrontEdit your side bar
- You might want to edit content on your sidebar on the left as it shows content that come with WordPress.
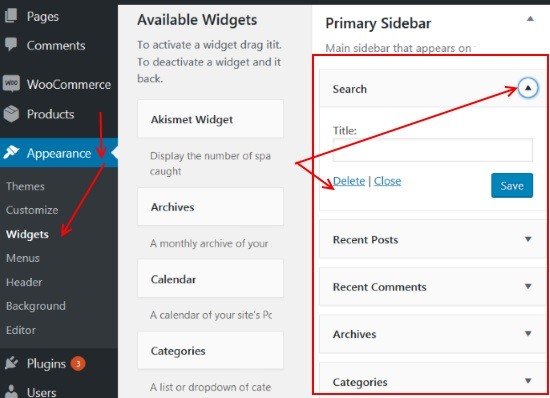
- Delete Widgets
Go to Appearance > Widgets
Click the down arrow in the right to expand the Widget.
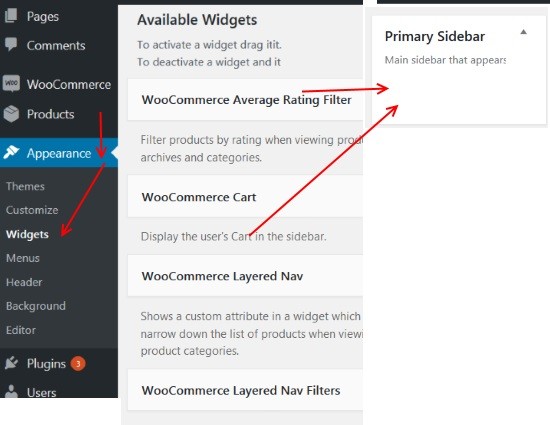
Click Remove from Widget’s interface. - click and drag new Widgets


Conclusion
WooCommerce truly is the best free ecommerce solution for WordPress.
In this tutorial, I explained the necessary configuration options to set up your site and add products to it. These steps are straight forward.
If you have any question(s) about the setup or product adding process, let me know in the comments section.
In case, you are looking for a super fast hosting solution for your store, here is a list of WooCommerce Hosting companies that provides managed hosting services for WooCommerce sites. Some of these Preinstall WooCommerce when signup.