

Even if your WordPress website publishes engaging content regularly, you need a healthy number of the right eyeballs to market your word.
However, it is no easy task to engage people to come back time after time on your page. Push notifications can become an elegant solution to hook readers up and involve them.
Push notifications – A more practical way to market your content
Push notifications have proved to be a more practical way to market your content, which has certainly gained more popularity in recent years. Most of these webpreneurs use these plugins to:
- Capture Audience
- Increase Return Visitors
- Get Increased CTR and Engagements Vs Typical Newsletter Signups
Let’s dig a bit deeper and know what these push notifications are, how they work and what their upsides are.
Push Notifications — An Introduction
So what exactly is a push notification? Every time you publish a blog or get it updated, the WordPress push notification gets kicked in. When handled smartly, these plugins can prove to be amongst the top referral source for your page. Similar to the desktop notifications, these are great tools to re-engage your existing audience right back at your page.
These are clickable notifications, which can even be displayed when your browser is not open. This procedure enables the conversion of your website visitors into prospective loyal customers and followers.
WordPress push notifications enable the audience to know when you have posted new content on your page. Not just content, these notifications can also propel out predefined messages. Despite being a relatively new marketing channel, this procedure has become an extremely popular marketing strategy to stay connected with your visitors.
Benefits of WordPress Push Notifications
With the help of WordPress Push Notifications, you can conveniently reach out to your readers regardless of their whereabouts. No matter what they are scrolling on the web, your notification of a new post will pop up on their screens.
Some major and dominant benefits these push notifications hold are:
- Alert subscribers whenever you publish a new blog post
- Send out coupons and deals if you’re selling a product
- Promote new product/feature releases
- The option to opt-in and out
- Entail lesser attention than an email
- Effective in diverting subscribers
However, moderation is the key feature here. Sending away push notifications frequently will make higher chances of forming annoyed subscribers.
How to Set Up Web Push Notifications in WordPress?
One of the popular push notification settings for WordPress can be performed using OneSignal plugin. This a free plugin service that enables both Mobile Push Notifications as well as Web Push Notifications
OneSignal Setup: Following are the steps that shows how to setup OneSignal plugin to enable push Notifications.
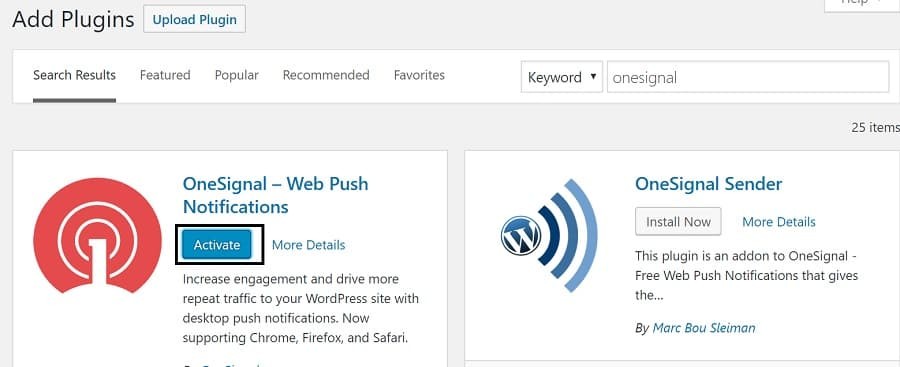
Step 1 : Install and activate OneSignal plugin
- Install OneSignal Plugin and then Activate OneSignal plugin after installation.
- Below the WordPress admin bar, you will see the OneSignal menu item after the plugin is activated.
- Open the plugin’s setting page by clicking the icon.

The setting page will show the tabs of Setup and Configuration.

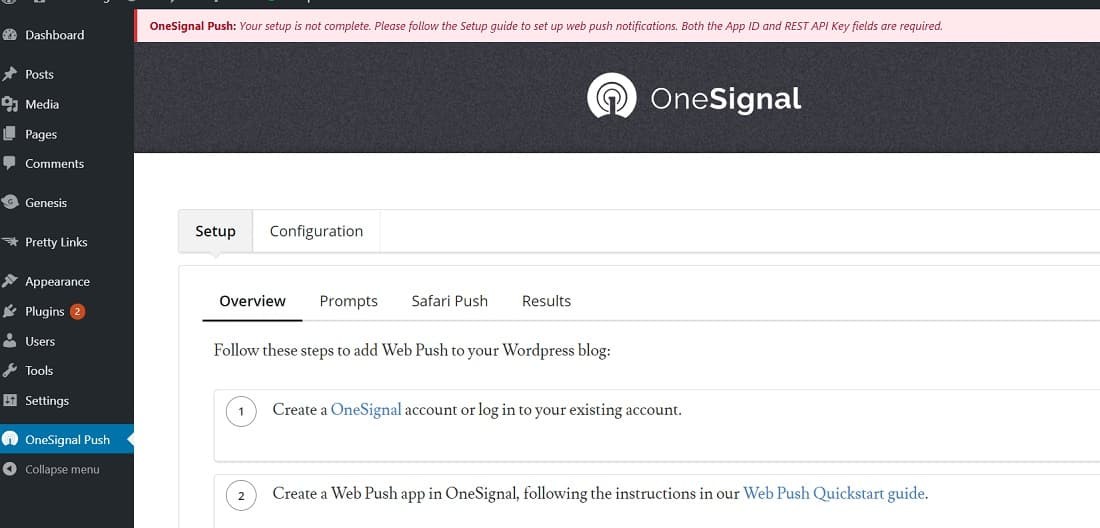
These tabs include thorough credentials on how to setup OneSignal push notifications in WordPress. On the plugin settings, add API keys and application IDs. To configure the plugin further, follow the steps mentioned below.
Step 2: Setting up Push Notifications for Chrome and Firefox
- Create a free account by visiting OneSignal website.
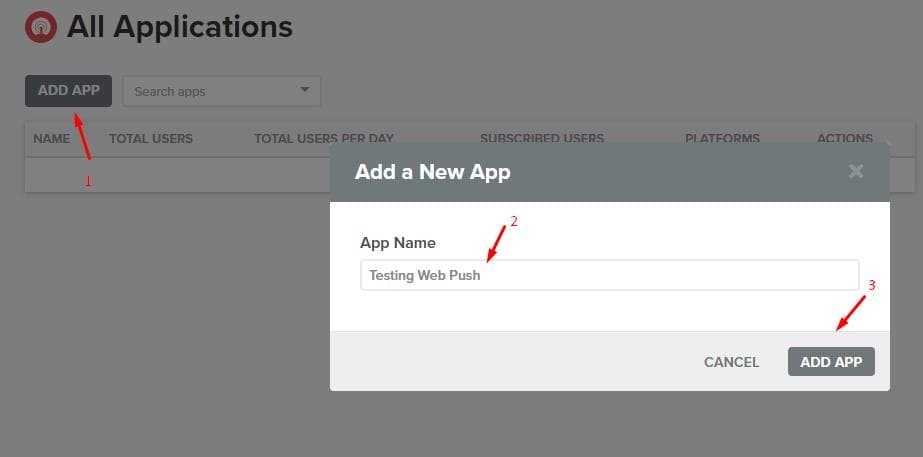
- Login to your account and click on Add a New App and enter App Name.
- After adding the name of your app, click on the Create
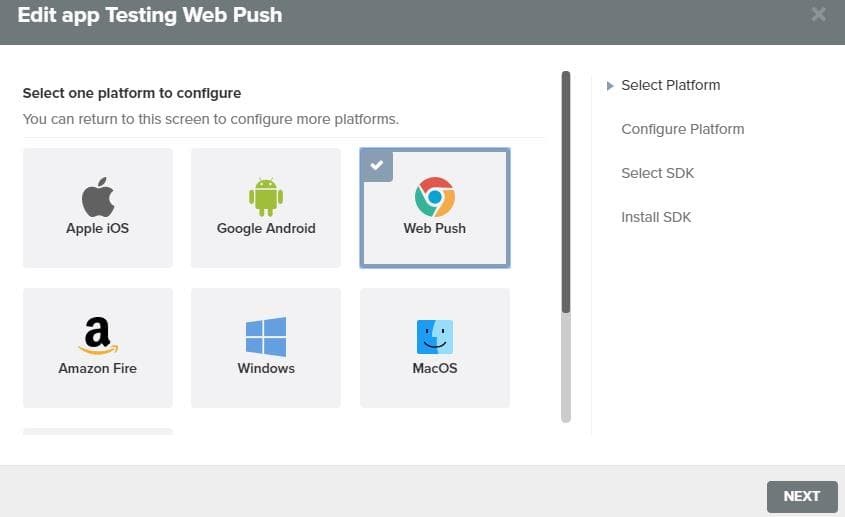
- Choose Website Push in the option to select a platform to configure, and click Next
- Choose Web Push box in the browser platform.
- Click
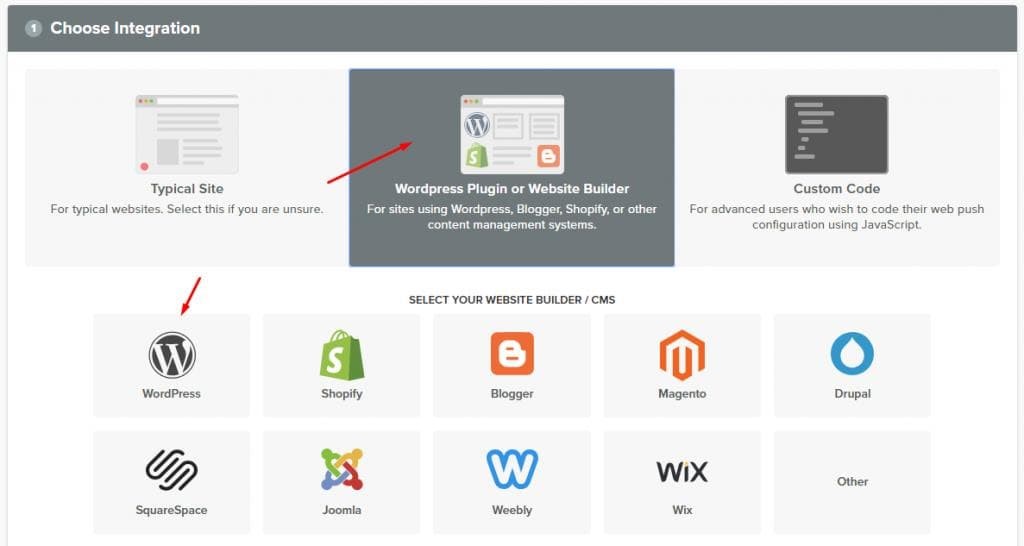
- On the nest screen, choose WordPress plugin or Website Builder—select WordPress.
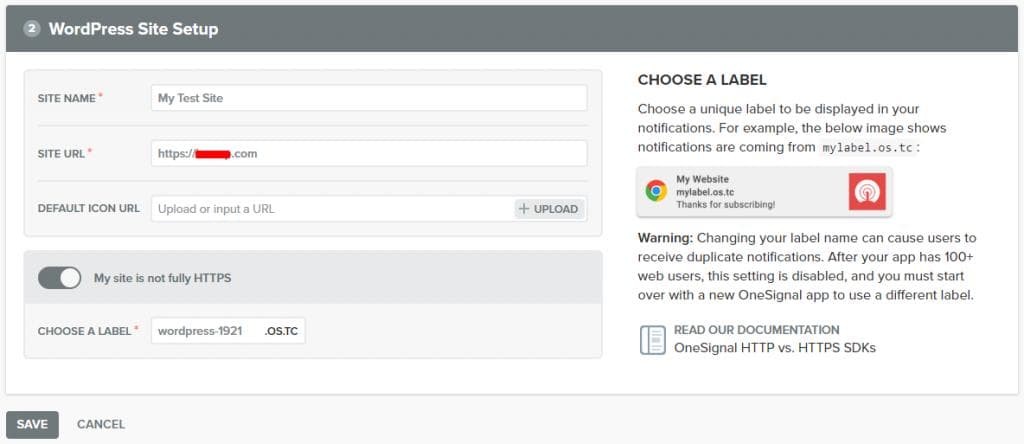
- Scroll below to add necessary details like, site name and site URL.
- Adjacent to My Site Is Not Fully HTTPS option, check that box in case your webpage is not supporting SSL/HTTPS. Nonetheless, it is not mandatory.
- Exit the current dialog box by clicking Click Yes when the dialog box of incomplete setup appears.
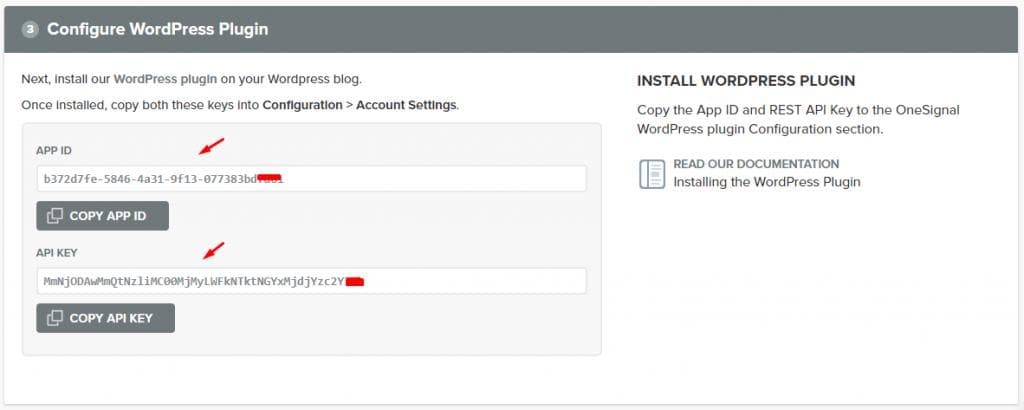
- Next, you will be provided the App ID and the API Key that would be used in setting up the OneSignal WordPress plugin.


Step 3: Enter OneSignal Keys in WordPress Onesignal Dashboard
- In your app dashboard, click App Settings.
- From the app settings page that appears next, click on the Keys & IDs tab.
- Paste the OneSignal App ID and Rest API Key appearing on your screen, to the configuration tab of the OneSignal WordPress plugin.
Step 4: Setting up Safari Web Push Notifications
- Move to your App Settings page after logging in to your OneSignal account.
- After scrolling down to web platforms, click on Configure, next to Apple Safari
- In the dialog box that appears next, enter the site name and URL.
- Next to ‘I’d like to upload my own notification icons’option, check the box.
- From the given options to upload different icon sizes, upload all your icons by clicking, Choose File
- Close dialog box after clicking Save.
- Refresh the page before scrolling below to the Web Platforms Web ID will appear under Apple Safari.
- Paste the Web ID to the Configuration tab of the OneSignal plugin.
By finishing these steps, the push notifications for your WordPress site will be configured successfully.
Step 4. Testing push notifications on your WordPress site
By default, the OneSignal plugin will add a subscription icon to your WordPress site. Follow these steps to initiate the test of the web push notifications on your WordPress site:
- In a supported browser, visit your WordPress site and click on the subscribe button. On the screen, a default, Thank You for Subscribing message will appear.
- After logging in to your OneSignal account, in the App Settings tab, click on your app name.
- Scroll below to the web platform section. Next, to the Firefox and Google Chrome options, click on
- On the platform configuration screen that appears next, click Save and Continue.
- Select the target SDK.
- Select WordPress. Click Next. Since you will have a single subscriber, your subscriber ID will be filled automatically.
- To open the Test Settings section, click Next.
- Click on Send Test Notification.
- You will receive a web push notification from OneSignal. Depending on the web browser you opted for, the notification may differ.
- After clicking on the notification that will appear on the screen, a confirmation message will appear. The message will inform about the successful OneSignal web push notifications set up.
- Click on the Check Notification Status button after returning to the OneSignal webpage configure screen. This will generate another message informing you about the successfully added web push notifications to your WordPress site.
Alternative Plugins to Set Up WordPress Push Notifications
Not a fan of OneSignal? There are also several other alternative plugin options available to choose from. Take a look at a few.
1. PushEngage Web Push Notifications
This plugin assists in adding Chrome and Firefox push notifications to your website. However, it is similar to OneSignal in a lot of ways.

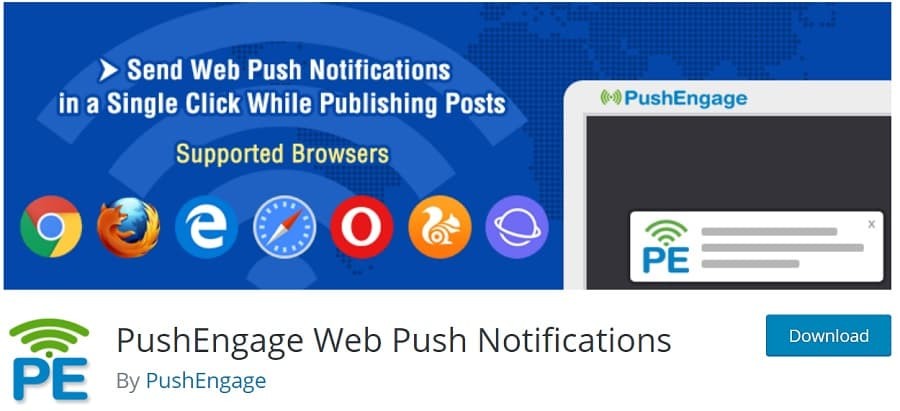
In addition to the basic push notification functionality, this plugin allows targeting specific segments of the subscribers. You can also schedule several push notifications in advance. This feature can also come convenient as a reminder for scheduled events.
2. Push Notifications for WordPress by PushAssist
Push Notifications for WordPress by PushAssist let the user set up push notifications for most chief browsers. Other than sending fully custom messages, this plugin can also configure the actions that trigger these notifications.

What makes this plugin stand out among the rest is its polished interface and how convenient it is to set up. It is one of the most straightforward WordPress push notification plugins. If you are not prepared to pay for the upgrade, its free plan cap of 3000 subscribers can be a hitch for you.
3. Push Monkey Pro
The feature that distinguishes this plugin from the rest is its ability to integrate your push notifications with WooCommerce. Push Monkey Pro enables you to aim consumers with abandoned carts on your site, and talk them into coming back and wrapping up their purchase.

Apart from this, it also maintains steady push notifications when you publish or update a post. It does not end just here; stats screen, this plugin offers displays you a lot of helpful information at a glance. Being a newbie, this hasn’t been fully endorsed yet, which is its only shortcoming. Nonetheless, for smaller businesses, it’s worth a gig.
4. Smart Notification WordPress Plugin
This is your all-in-one solution for all your plugin needs. This plugin allows push notifications to be sent with more platforms than just browsers. In addition to the squares like Chrome, Firefox, and Safari, it also supports Facebook Messenger notifications and mobile operating systems. However, you require a lot of setup work to be executed to get all those types of notifications working.


5. Free Web Push Notification Tool by iZooto
This plugin functions differently than the rest mentioned above. This plugin aids to create and deliver campaigns via push notifications instead of setting up WordPress push notifications for new posts or updates.

If you are running an online store rather than a blog, this can be extremely beneficial for you. This is the only plugin that is delivering this offer for free. In addition to offering styling options for your WordPress push notifications, this plugin has the only downside of being new into the market.
Casing Gears Up!
If you are looking for a way to stay in touch with the visitors of your site visitors, then there isn’t a better option than WordPress push notifications. With the facility of consent, you can be certain that the subscribers are actually the individuals who are interested in what you are doing.
This facility of plugin notifications has made the marketing channel lucrative and quite effective. If you are eager to expand and are looking for ways to cushion your goal, this is where you should begin. If you have a strict timeline to address or you need any assistance in setting up these plugins, then you can connect with PressTigers. They will not just fix the plugins request but they are highly capable to account for every pitch, related to WordPress. So if you are looking to hire a WordPress developer who is competent and reliable, then PressTigers is the place to be.